Features of the Revolut Gateway for WooCommerce plugin
The Revolut Gateway for WooCommerce plugin provides several essential features for managing your online store.
Fast checkout
Enhance your customers' shopping experience by offering Fast checkout options using Revolut Pay, Apple Pay, and Google Pay. This feature allows customers to bypass the standard checkout process, eliminating the need to manually enter shipping and billing details. All necessary information is automatically retrieved from the customer's saved details, providing a seamless and expedited purchasing process.
For more information about Revolut Pay, see: What is Revolut Pay?
To use the Fast checkout feature, ensure you are using the latest version of the Revolut Gateway for WooCommerce plugin (v4.0.0 or above). For more information about installation, see: Install the WooCommerce plugin.
Enable Fast checkout for Revolut Pay
- Log in to your WooCommerce dashboard as admin.
- Navigate to Plugins on the left sidebar.
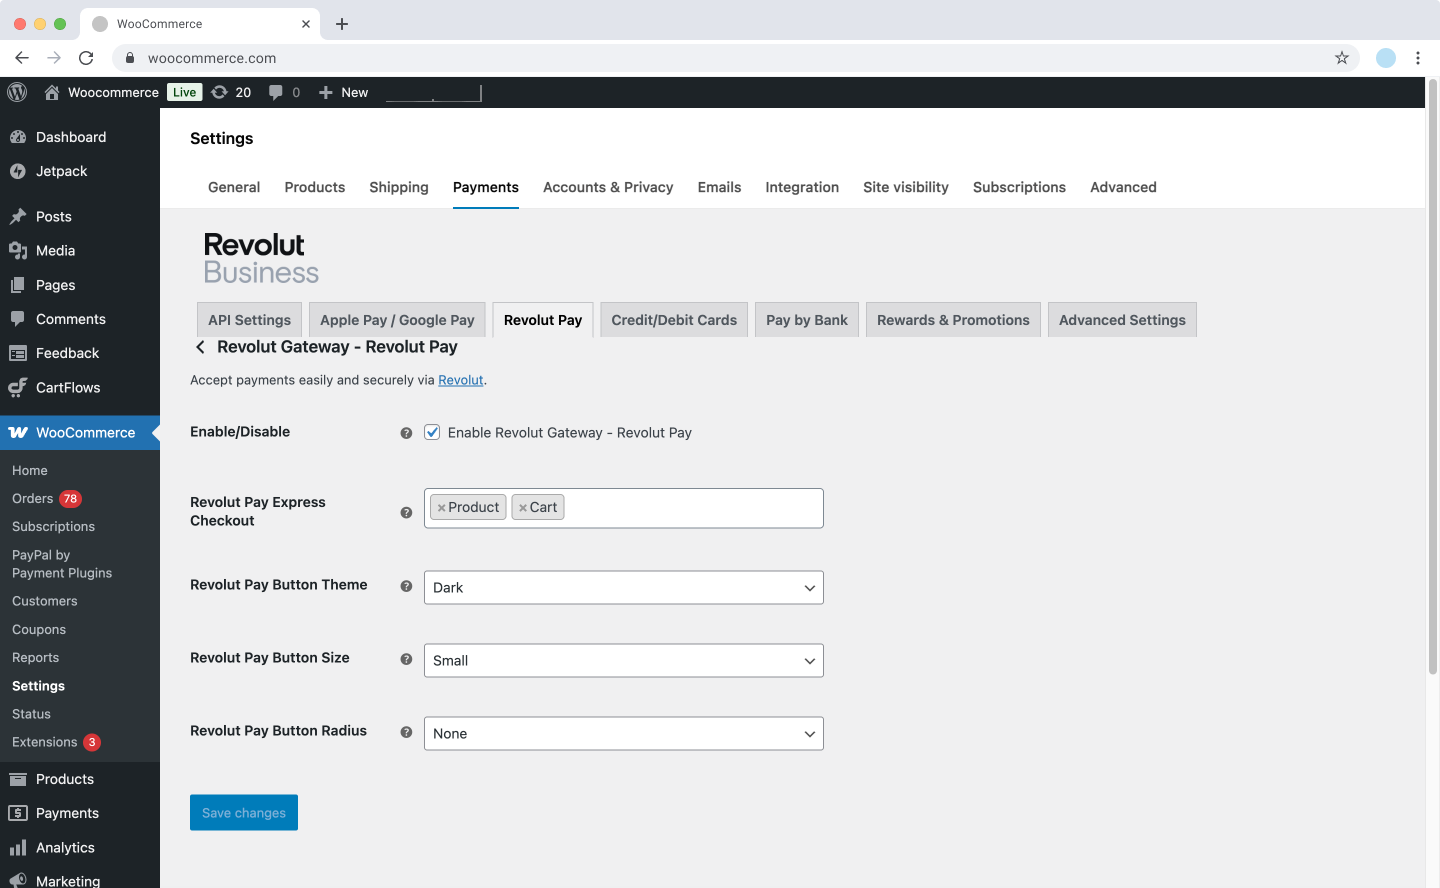
- Click Settings under the Revolut Gateway for WooCommerce plugin, and navigate to the Revolut Pay tab:
-
In the Revolut Pay Fast checkout field, select where you want the Revolut Pay button displayed for Fast checkout. Possible values:
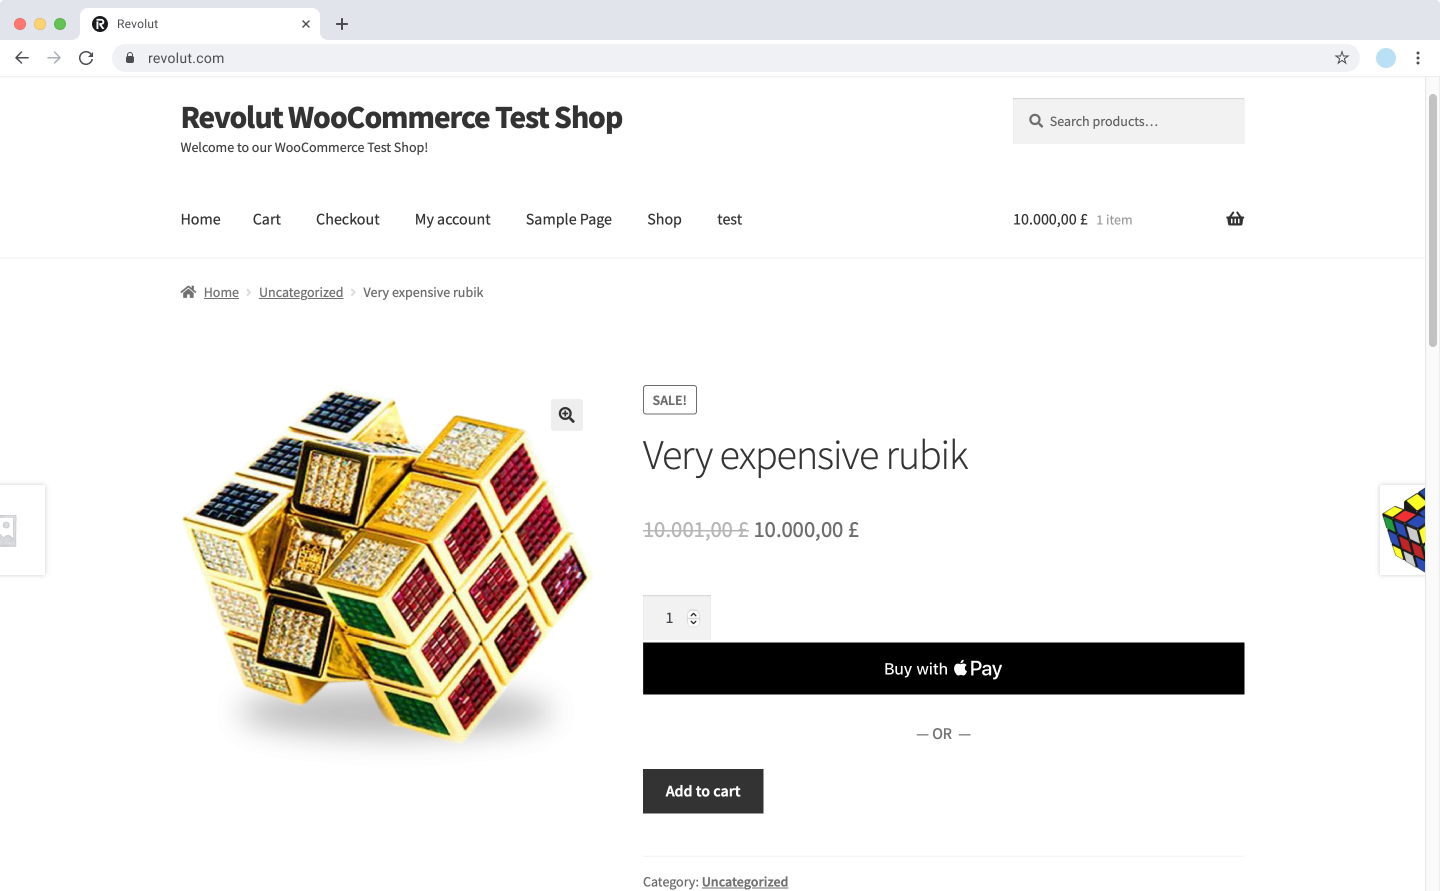
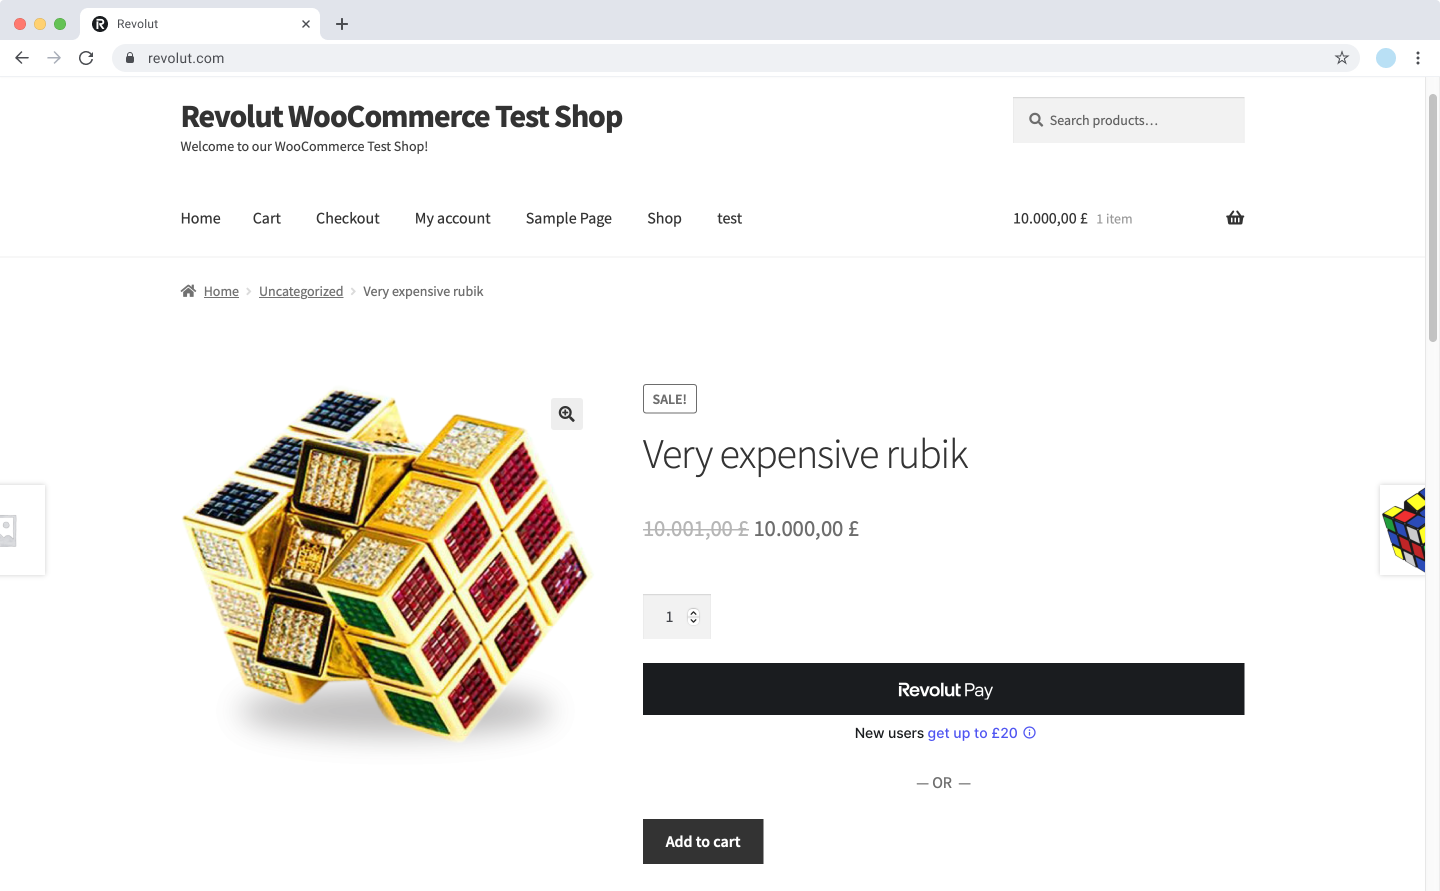
- Product: Adds the Revolut Pay button, using the Fast checkout flow, to the product page as an alternative to the Add to cart option.
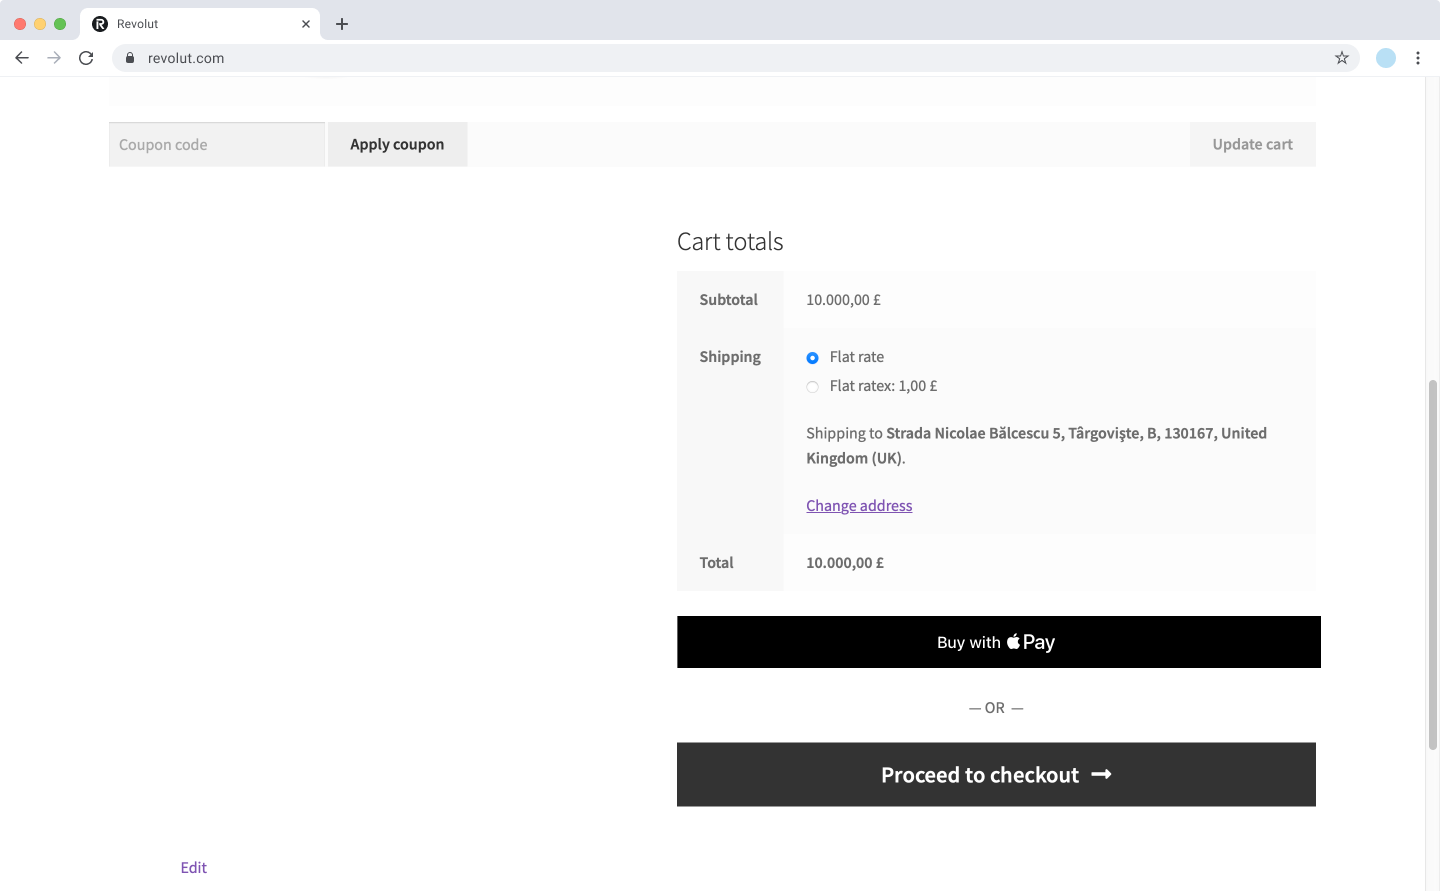
- Cart: Adds the Revolut Pay button, using the Fast checkout flow, to the cart page as an alternative to the Proceed to checkout option.
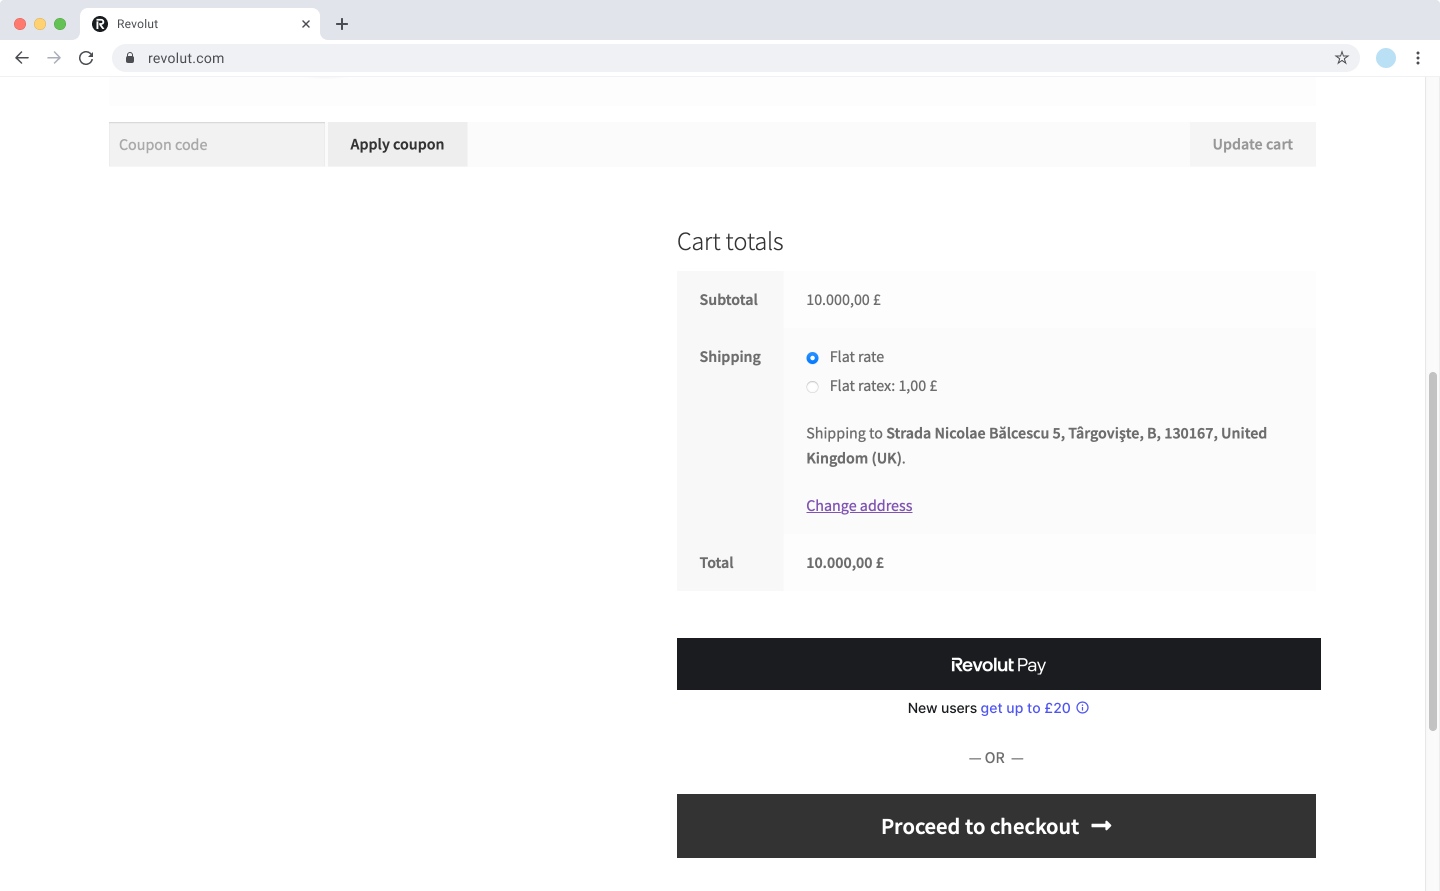
Customers can use the Revolut Pay button to skip the usual checkout flow.
- Click Save changes to apply the changes.
Enable Fast checkout for Apple Pay and Google Pay
-
Log in to your WooCommerce dashboard as admin.
-
Navigate to Plugins on the left sidebar.
-
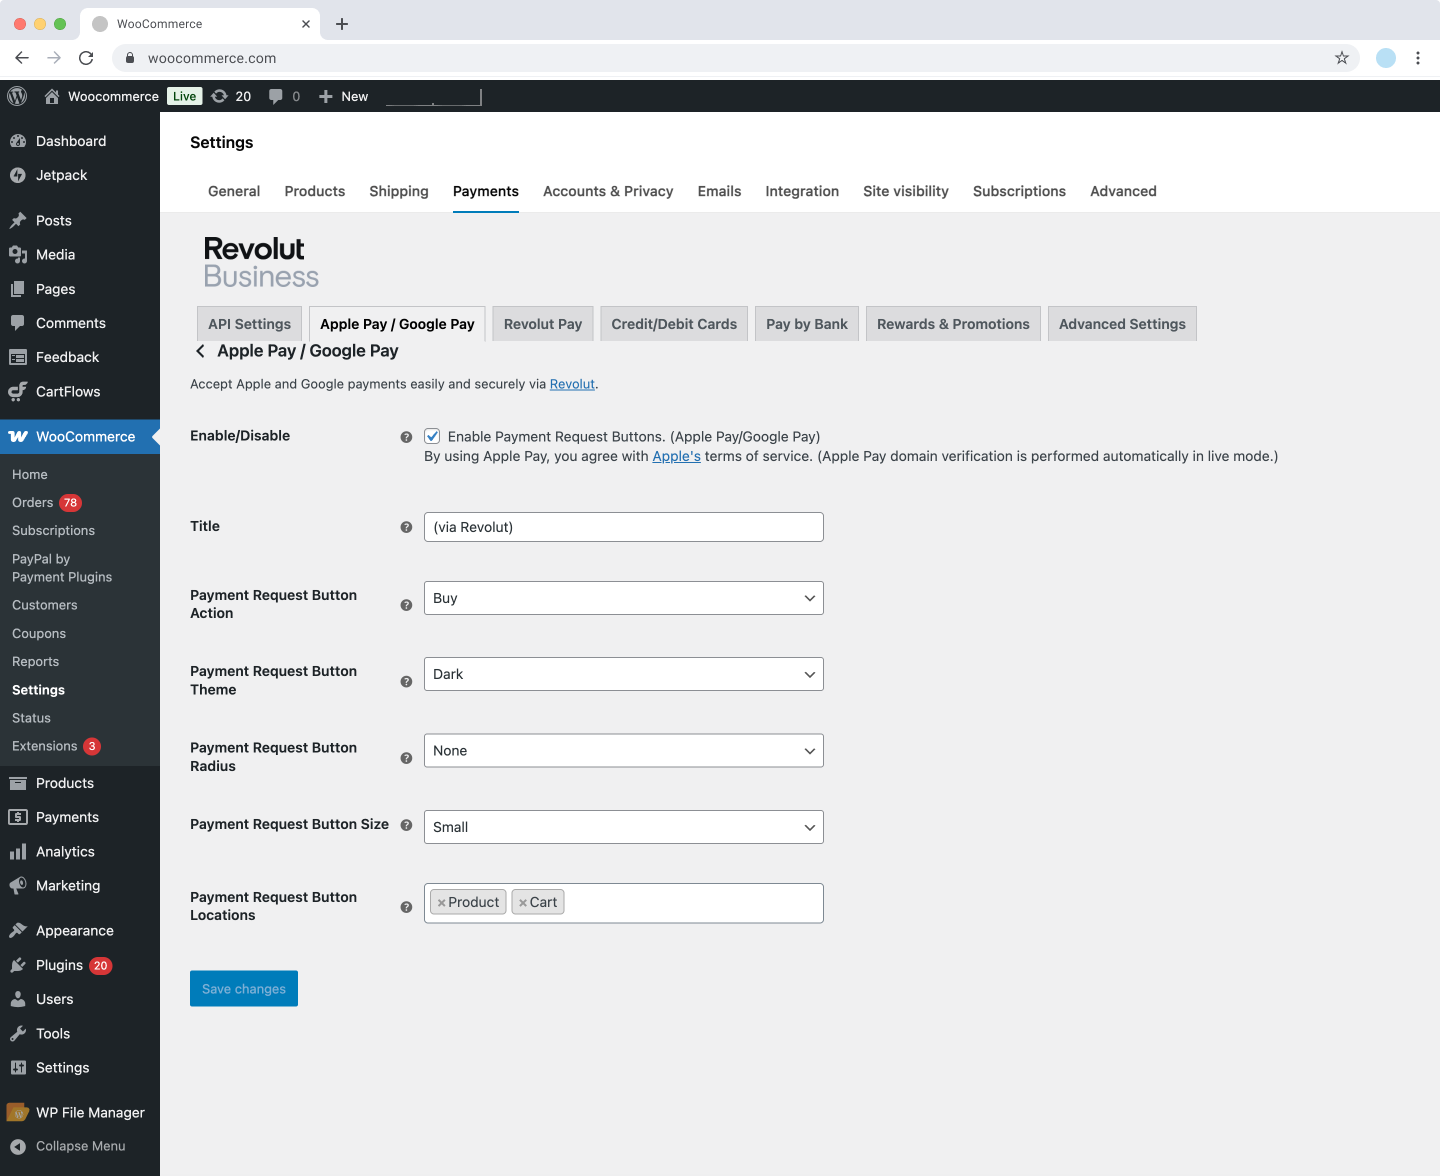
Click Settings under the Revolut Gateway for WooCommerce plugin, and navigate to the Apple Pay / Google Pay tab:
-
In the Payment Request Button Locations field, select where you want the payment button displayed for Fast checkout. Possible values:
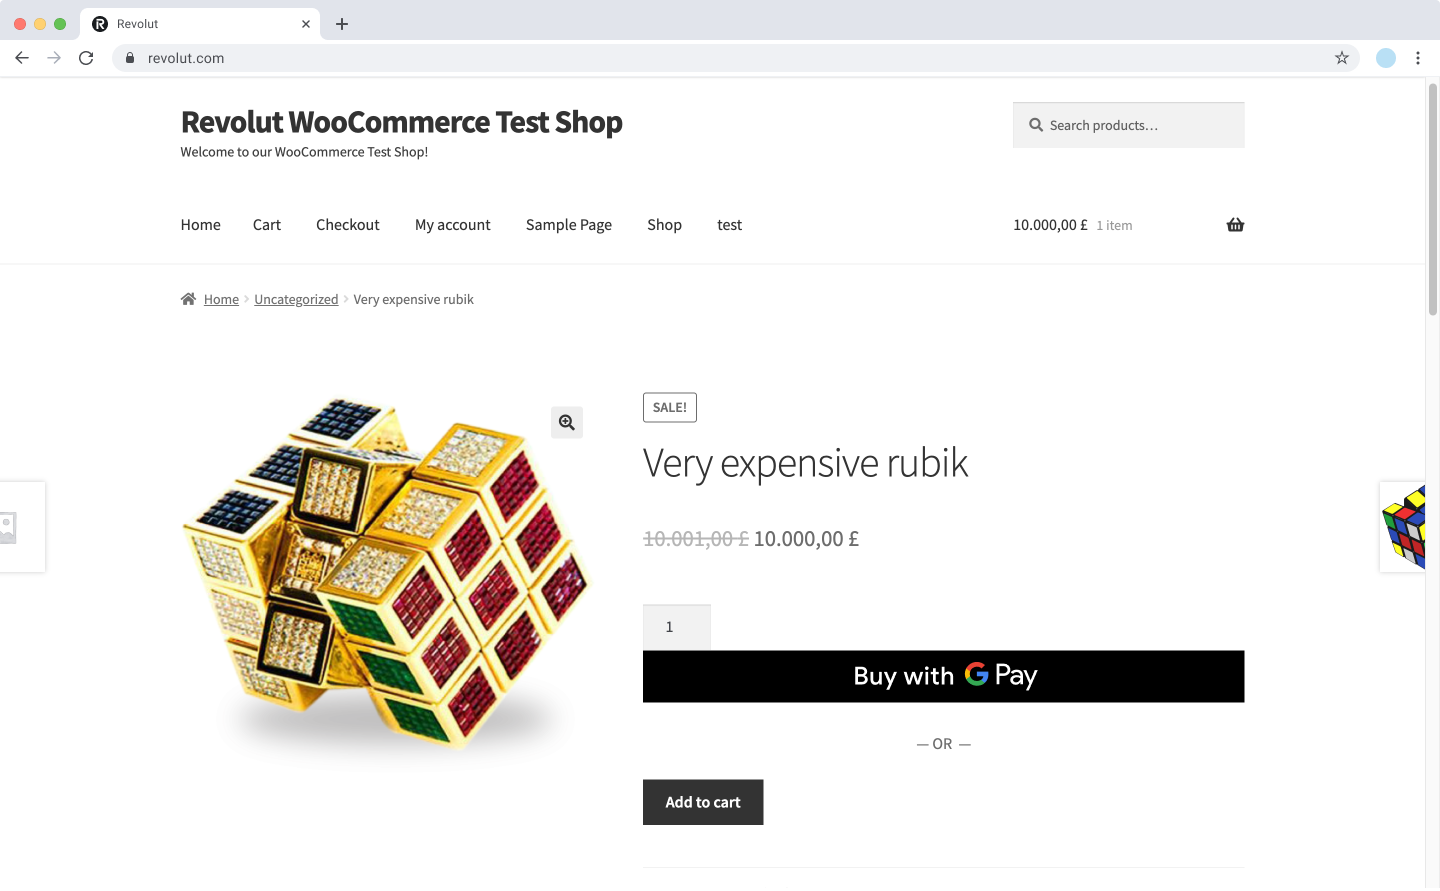
- Product: Adds the button, using the Fast checkout flow, to the product page as an alternative to the Add to cart option.
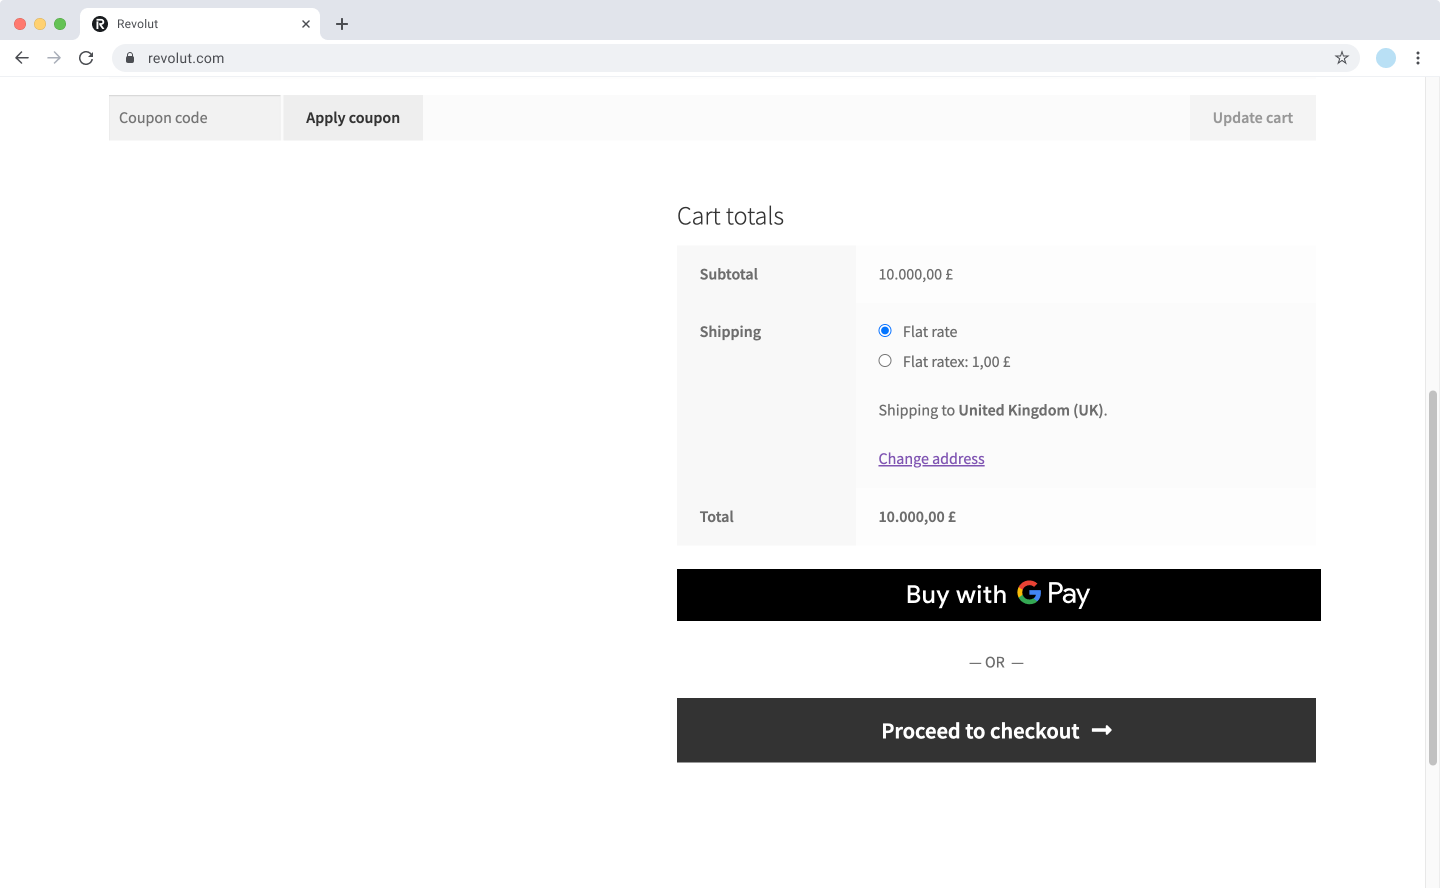
- Cart: Adds the button, using the Fast checkout flow, to the cart page as an alternative to the Proceed to checkout option.
Customers can use the Apple Pay or Google Pay button to skip the usual checkout flow.
- Click Save changes to apply the changes.
Now your customers can use Fast checkout with Revolut Pay, Apple Pay, and Google Pay.
Refund orders
Refund orders directly from your WooCommerce admin dashboard. You can refund complete orders, specific items from orders, or a custom amount. To issue refunds, follow these steps:
- Log in to your WooCommerce dashboard as admin.
- Navigate to WooCommerce > Orders on the left sidebar.
- Click on the order you wish to refund to view its details.
- In the Item section, click the Refund button.
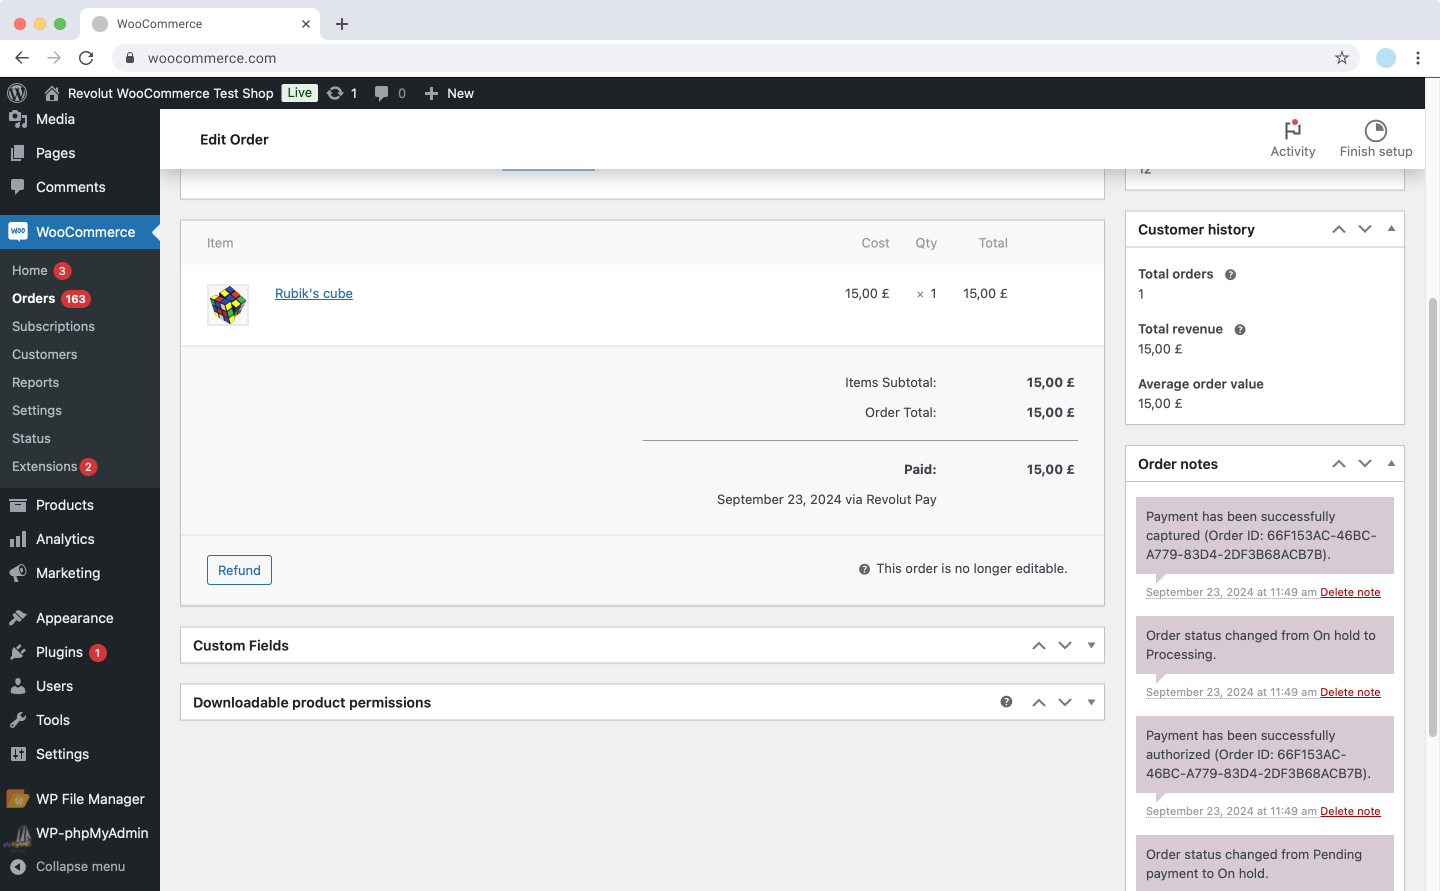
- Enter the quantities of the items you want to refund, or specify a custom amount in the Refund amount field:
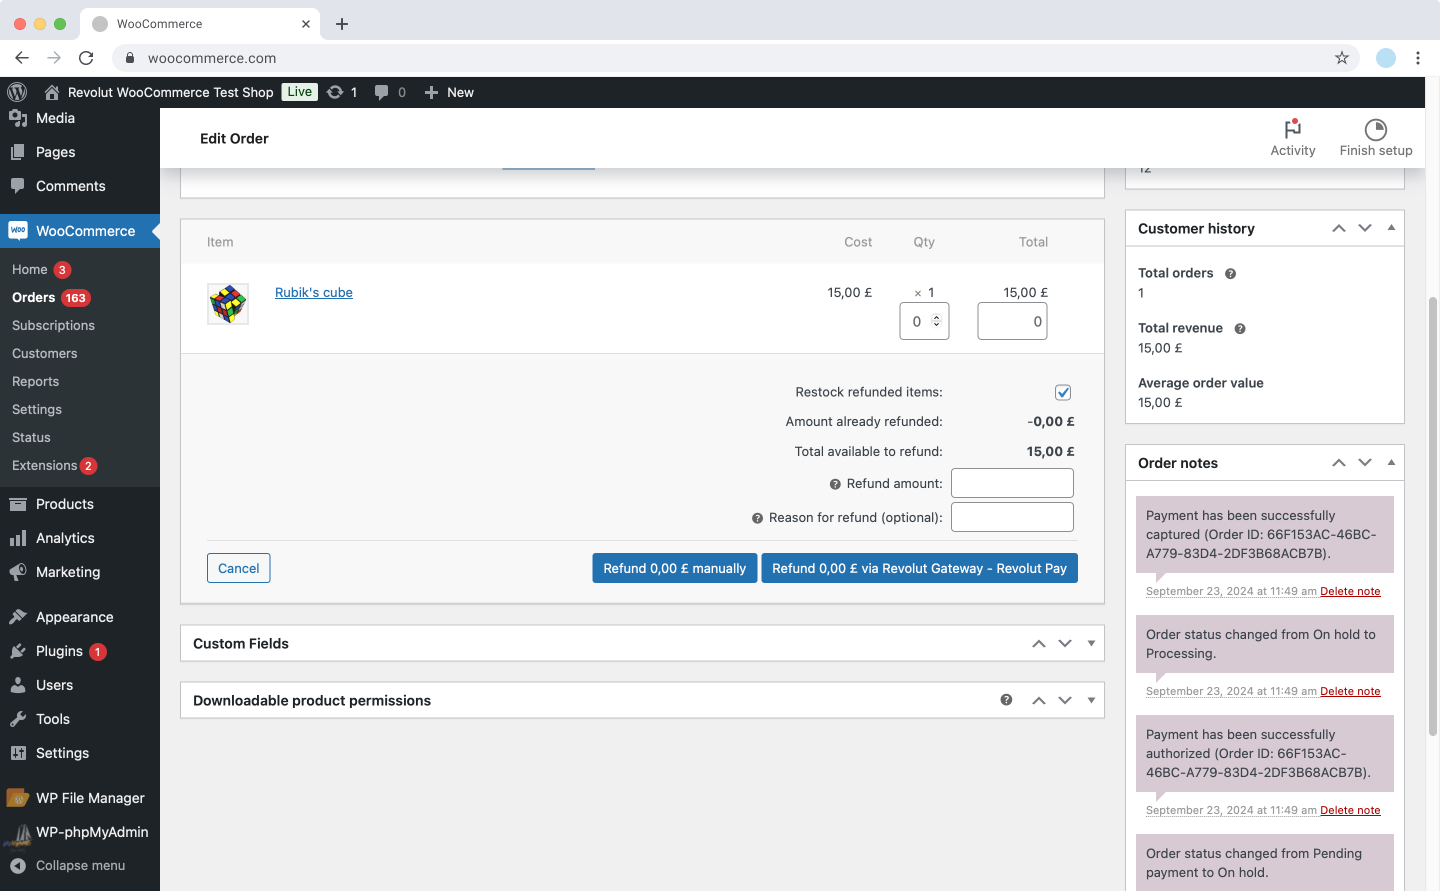
- Optionally, provide a reason for the refund in the Reason for refund field.
- Choose the refund method by clicking Refund via Revolut Gateway.
- Confirm the refund details and click OK in the pop-up. The refund will be processed, and the order status will be updated accordingly.
- Verify the order status by reloading the page.
You've successfully issued a refund through Revolut in WooCommerce.
Manual capture
Manually capture authorised payments directly from your WooCommerce admin dashboard. This feature is useful when you've set the plugin to authorize payments but wish to capture them at a later time, giving you greater control over your transactions and cash flow.
Before you begin, ensure that the plugin is configured to Authorize only payments:
- Log in to your WooCommerce dashboard as an admin.
- Go to Plugins > Installed Plugins > Revolut Gateway for WooCommerce > Settings
- Under the API Settings tab, set Capture Mode to Authorize only.
- Click Save changes to apply the changes.
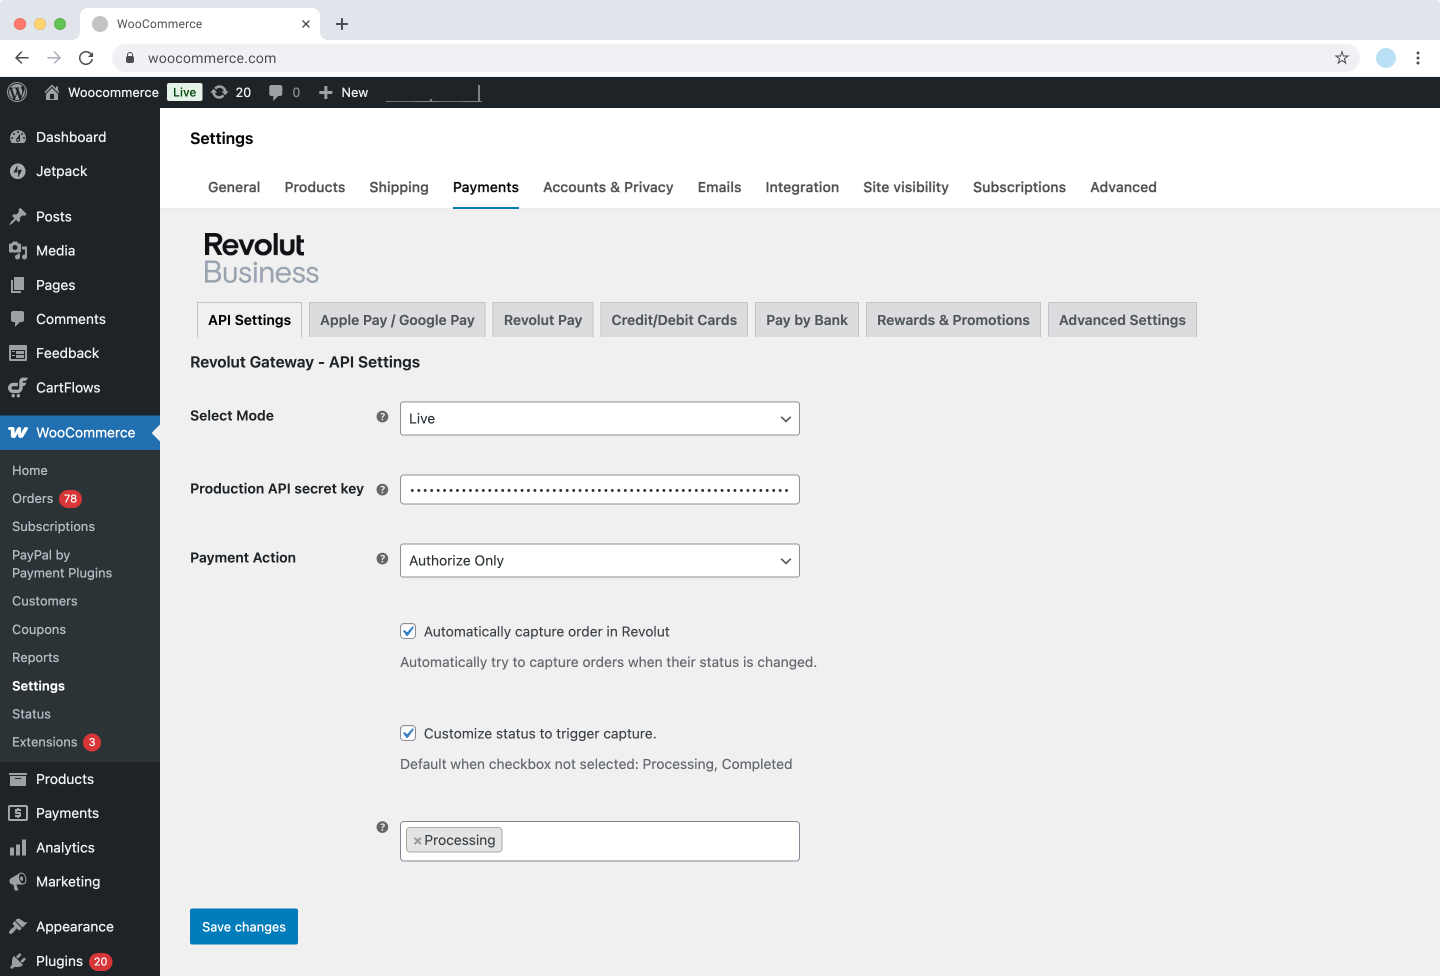
Additionally, you can specify which order statuses will trigger the capture of authorised payments:
- Customize status to trigger capture: Select the order statuses (e.g., Processing, Completed) that will automatically trigger the capture process when an order transitions into them.
Options to capture an order manually
You have two options to manually capture an authorised order:
Using the WooCommerce dashboard
- Log in to your WooCommerce dashboard as admin.
- Navigate to WooCommerce > Orders on the left sidebar.
- Click on the order you wish to capture to view its details.
- Change the order status to one of the statuses you've set in the Customize status to trigger capture field (e.g., Processing or Completed).
- Click Update to save the changes.
The payment will now be captured, and the order status will be updated accordingly.
If you have not selected the Automatically capture order in Revolut checkbox in the plugin settings, you need to manually capture payments either through the WooCommerce dashboard or the Revolut Business dashboard as described above.
You've successfully captured the customer's authorised order.
Cancel orders
Cancel uncaptured orders seamlessly within the WooCommerce admin interface. The integration ensures that cancellations are reflected in your order management system.
You can only cancel orders if your store is configured for manually capturing orders.
Orders already captured can only be refunded.
To cancel uncaptured orders:
- Log in to your WooCommerce dashboard as admin.
- Navigate to WooCommerce > Orders on the left sidebar.
- Click on the order you wish to cancel to view its details.
- In the Order details section, locate the Status dropdown menu.
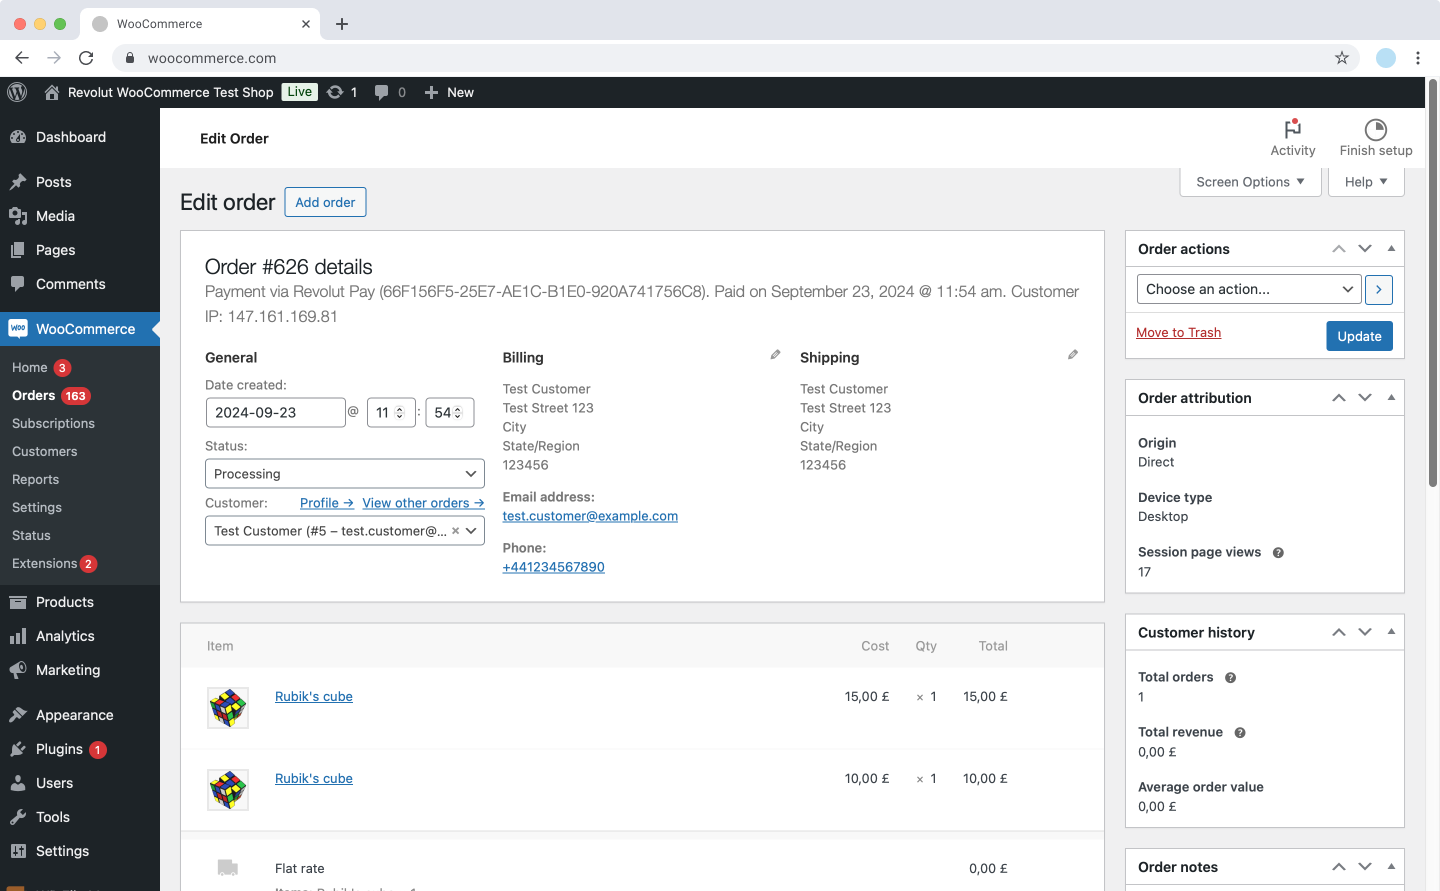
- Change the order status to Cancelled.
- Click Update in the Order actions section to save the changes.
- The order status will be updated to Cancelled, and the cancellation will be reflected in your Revolut Merchant account.
You've successfully cancelled the order. The cancellation is now synchronised with your Revolut Merchant account.
Customise the widget's style
If the plugin does not adapt visually to your website's theme by default, you can customise its color and appearance. You can adjust settings for Revolut Pay, Apple Pay and Google Pay, and the Card field individually.
Customise Revolut Pay
-
Log in to your WooCommerce dashboard as an admin.
-
Navigate to Plugins on the left sidebar.
-
Click Settings under the Revolut Gateway for WooCommerce plugin.
-
Navigate to the Revolut Pay tab in the plugin settings.
-
Modify the following options:
- Revolut Pay Button Theme: Select the colour theme of the Revolut Pay button. Possible values: Dark, Light, Light-Outline.
- Revolut Pay Button Size: Choose the size of the Revolut Pay button. Possible values: Large, Small.
- Revolut Pay Button Radius: Set the border radius of the payment button. Possible values: None, Small, Large.

-
Click Save changes to apply the changes.
Customise Apple Pay and Google Pay
-
Log in to your WooCommerce dashboard as admin.
-
Navigate to Plugins on the left sidebar.
-
Click Settings, under Revolut Gateway for WooCommerce plugin.
-
Navigate to the Apple Pay / Google Pay tab in the plugin settings.
-
Modify the following options:
- Payment Request Button Action: Choose the text displayed on the payment button. Possible values: Buy, Donate, Pay.
- Payment Request Button Theme: Select the colour theme of the payment button. Possible values: Dark, Light, Light-Outline.
- Payment Request Button Radius: Set the border radius of the payment button. Possible values: None, Small, Large.
- Payment Request Button Size: Choose the size of the payment button. Possible values: Large, Small.

- Click Save changes to apply the changes.
Customise Card field
-
Log in to your WooCommerce dashboard as admin.
-
Navigate to Plugins on the left sidebar.
-
Click Settings, under Revolut Gateway for WooCommerce plugin.
-
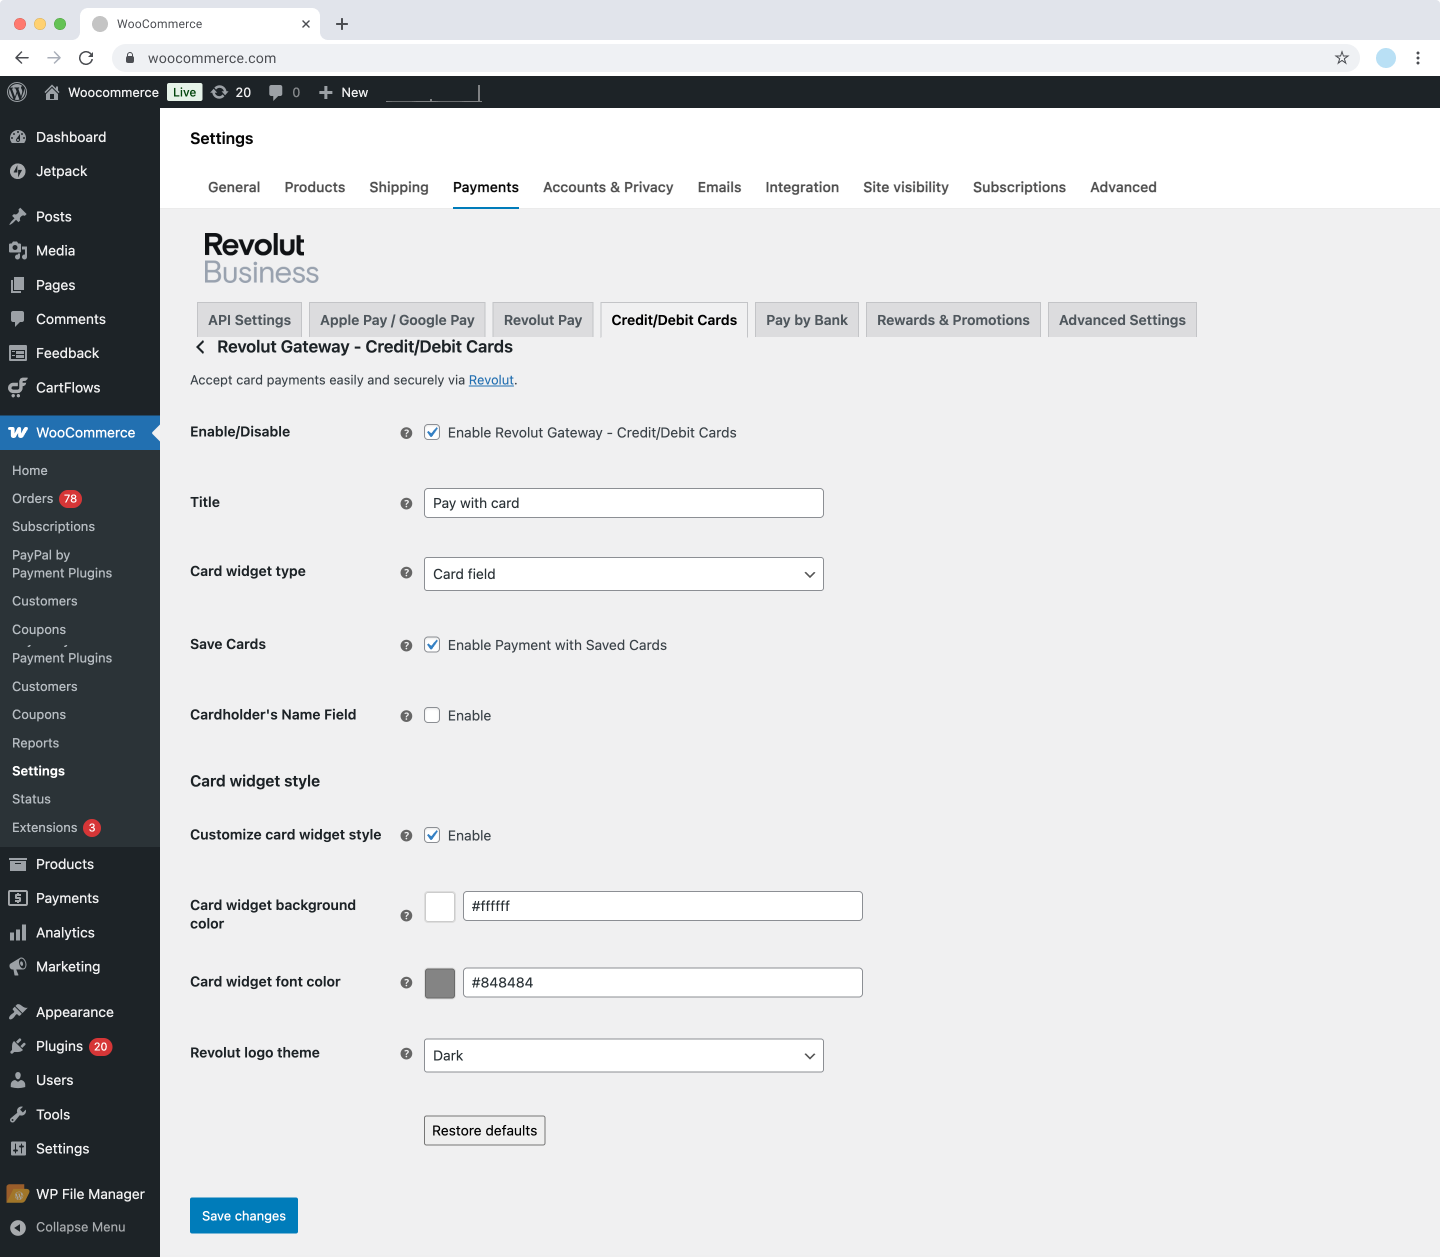
Navigate to the Credit/Debit Cards tab in the plugin settings.
-
Select Card field in the Card widget type option.
-
In the Card Widget Style section, select the Enable checkbox to customise the card widget style.
-
Adjust the widget's background and font colour to match your website's theme:
- Card Widget Background Color: Set the background color of the card widget.
- Card Widget Font Color: Set the font color of the card widget.
- Revolut Logo Theme: Choose the theme of the Revolut logo displayed on the card widget. Possible values: Dark, Light.
-
Click Save changes to apply the changes.
View your changes
Reload your checkout page to see the changes you have made.
You've successfully customised the plugin's style.
