Product and catalogue management
The product and catalogue management feature is a vital part of the POS system. It allows you to define your product offerings, organise them into categories, and customise options like variations (e.g., sizes) and modifiers (e.g., add-ons). This ensures:
- Faster and more accurate order processing.
- A better customer experience with flexible product options.
- Efficient management through bulk imports and centralised updates.
With Revolut POS, this feature integrates seamlessly with other functionalities like order management and analytics, helping you run your business efficiently.
Basic products can be created in the POS app, but variations, modifiers and images are only available via the web app.
Products
This section covers how to create, manage, and edit products. Products are the foundation of your POS system, representing the items or services you sell.
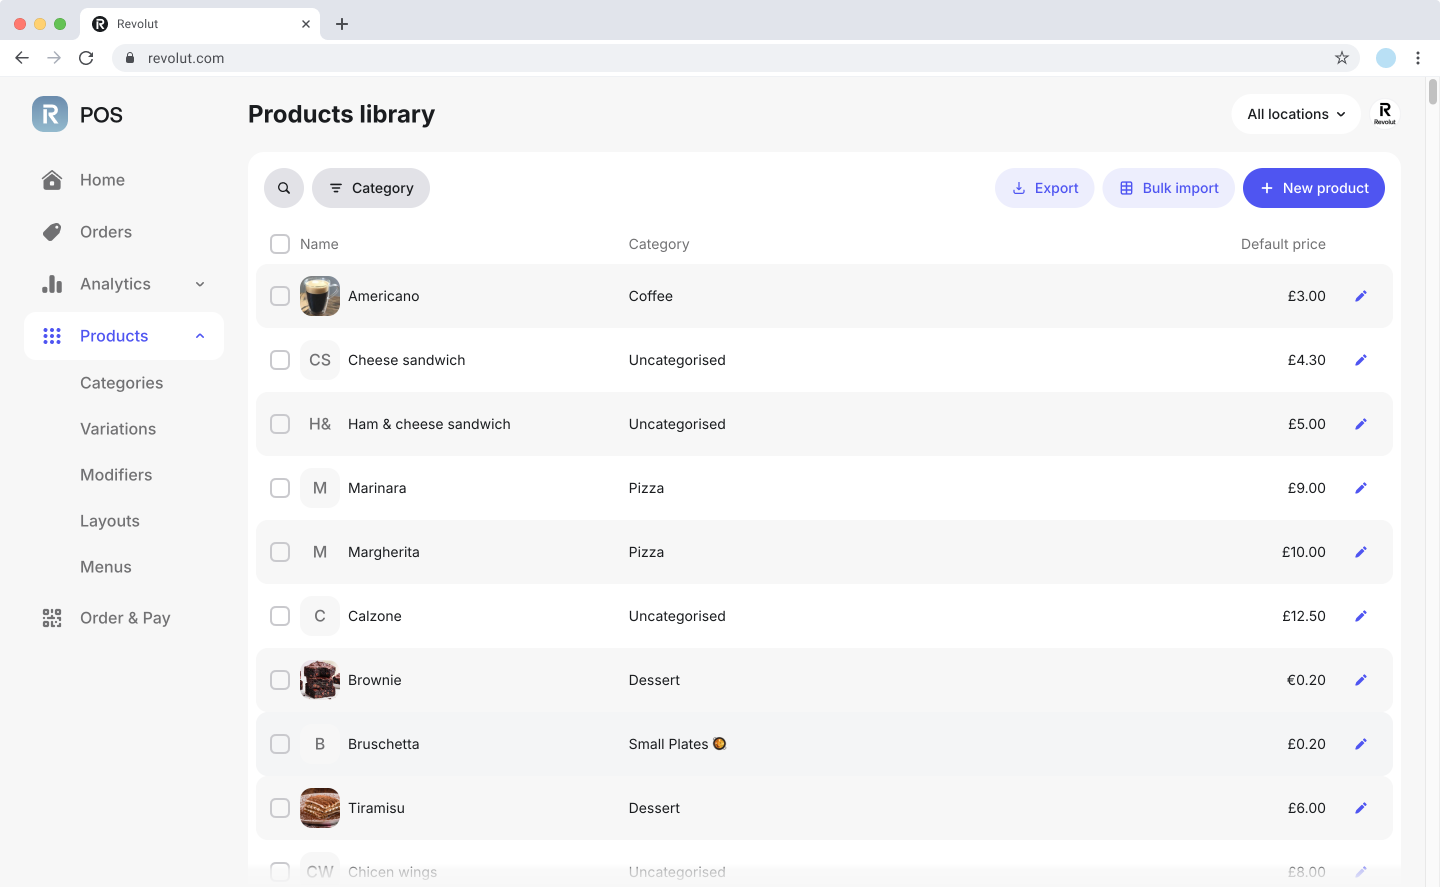
Add products
To add a new product:
- Navigate to Products on the left sidebar.
- Click
New productat the top of the table. - Fill in the following details in each section:\
- Product info: General information about the product.
- Name: Enter the product name.
- Category: Assign the product to an existing category or create a new one.
- Description: Optionally, provide a short description of the product.
- Media: Optionally, you can upload a photo of the product.
- Price: Add pricing info of your product.
- Unit: Specify the unit (e.g., per item, per hour).
- Retail price: Include the price with sales tax.
- Sales tax: Select an applicable tax rate.
- Add take away price: If enabled, you can set separate prices for different fulfilment types (e.g., dine-in vs. takeaway) and select an applicable tax rate.
- Product info: General information about the product.
- Optionally, add Variations (you need to create them first) for the product to have different options (e.g., sizes, flavours):
- Click
Addand specify:- Variation set name: Select the variation set from the list (e.g., "Size").
- Variations: Select the specific options for the product (e.g., "Small," "Medium," "Large").
- Click
Add variationsto save the changes. - Assign different prices to each variation if necessary.
- Click
- Optionally, add Modifiers (you need to create them first) for the product to include custom options (e.g., cooking preferences, add-ons):
- Click
Addto open a pop-up. - Select all the modifier sets to add for the product
- Click
Continueto save the changes. - Select all modifiers to apply to the product.
- Click
- Review the details, and click
Saveto create the product.
For faster access, use the quick action by clicking New product directly from the homepage.
Edit products
To update product details:
- Navigate to Products on the left sidebar.
- Click the icon next to the product you want to modify.
- Update any of the product details and click
Saveto apply changes.
Delete products
To remove a product:
- Navigate to Products on the left sidebar.
- Click the icon next to the product you want to delete.
- Click Delete in the top right corner.
- Confirm your choice to remove the product from your system.
To delete multiple products at once, select products using the checkboxes, then click Delete in the action panel.
Categories
Categories help organise products for easier management. They allow you to group similar products together, making it easier for staff to find and process items during transactions.
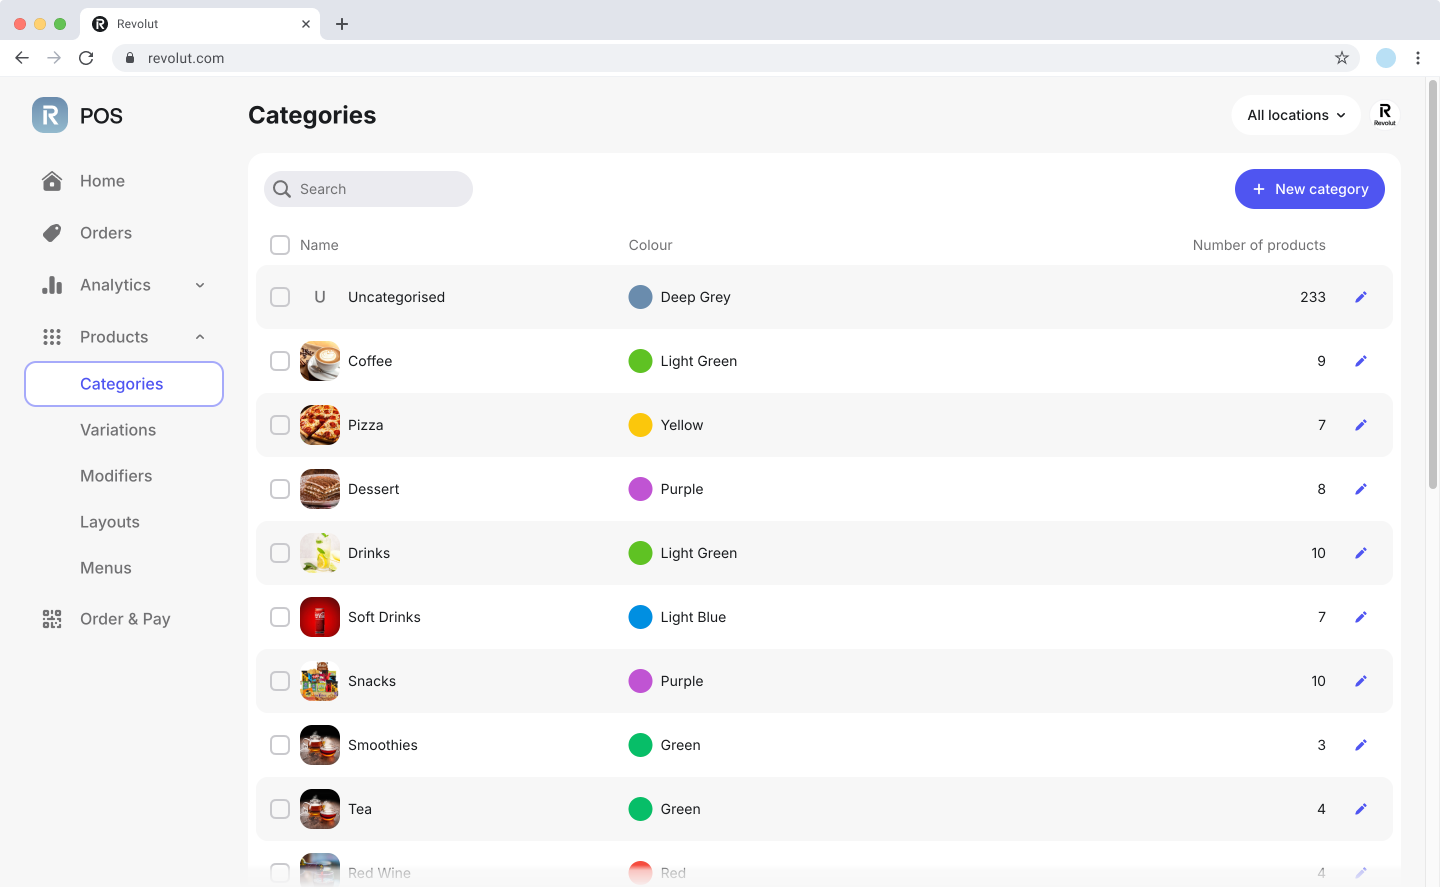
Add categories
To add a new product category:
- Navigate to Products > Categories on the left sidebar.
- Click
New category. - Enter the Name and choose a colour for easy identification.
- Optionally, you can upload a photo representing the category.
- Click
Saveto create the category.
Edit categories
To modify a category:
- Navigate to Products > Categories on the left sidebar.
- Click the icon next to the category you want to modify.
- Update any of the category details and click
Saveto apply changes.
Delete categories
To remove a category:
- Navigate to Products > Categories on the left sidebar.
- Click the icon next to the category you want to delete.
- Click
Delete. - Confirm your choice to remove the category from your system.
To delete multiple categories at once, select categories using the checkboxes, then click Delete in the action panel.
Variations
Variations allow you to offer multiple options for a product (e.g., drink sizes, flavors). They let you create flexible product offerings to match customer preferences while keeping your product catalogue organised. Each variation can have its own price, and other attributes, enabling you to handle diverse product configurations effortlessly.
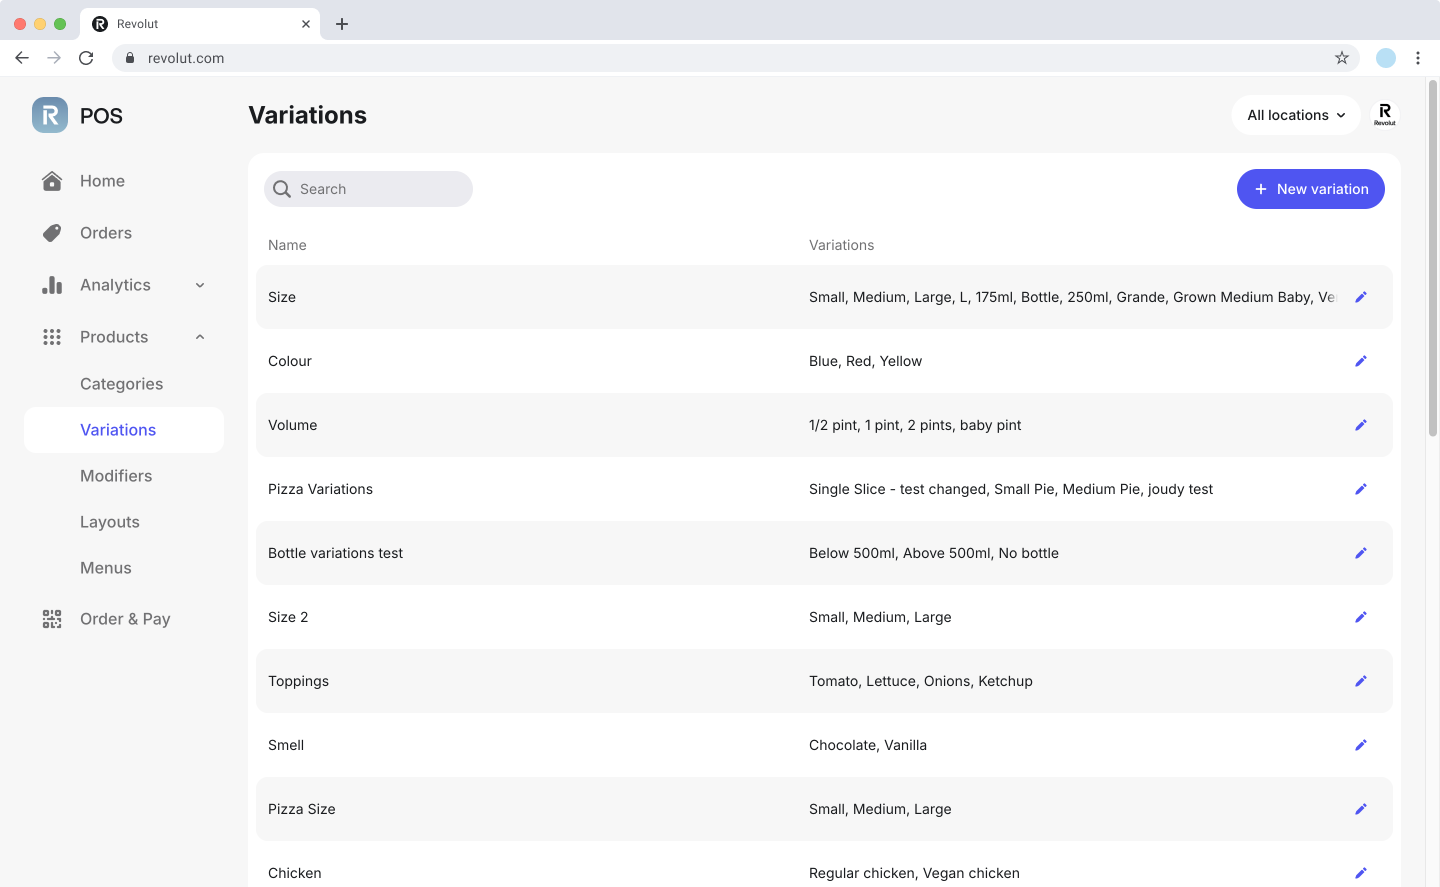
Before assigning variation sets to products, the variation sets need to be created. Once created, these sets can be applied during product creation or editing.
Add variations
To add a new product variation set:
- Navigate to Products > Variations on the left sidebar.
- Click
New variation. - Enter the variation set's details:
- Name of your variation set (e.g., "Size").
- Add its Variations (e.g., "Small", "Medium", "Large").
- Click
Add variationto add additional options as needed. - Optionally, rearrange the order of the variations by dragging and dropping them.
- Click
Saveto create the variation set.
Assign variations
Variations can be added to a product either while creating a new product or editing an existing one.
- Navigate to Products on the left sidebar.
- Click
New productto create a new product. - Click
Addto enable Variations and specify:- Variation set name: Select the variation set from the list (e.g., "Size").
- Variations: Select the specific options for the product (e.g., "Small," "Medium," "Large").
- Click
Add variationto save the changes.
- Assign different prices to each variation if necessary.
- Click
Saveto apply the changes.
Edit variations
To modify a variation set:
- Navigate to Products > Variations on the left sidebar.
- Click the icon next to the variation set you want to modify.
- Update any of the variation details and click
Saveto apply changes.
Delete variations
To remove a variation:
- Navigate to Products > Variations on the left sidebar.
- Click the icon next to the variation set you want to delete.
- Click
Delete. - Confirm your choice to remove the variation set from your system.
Modifiers
Modifiers let you add custom modifications for products (e.g., cooking preferences for burgers). These options enhance flexibility by allowing customers to personalise their orders, while keeping your product catalogue organised and efficient.
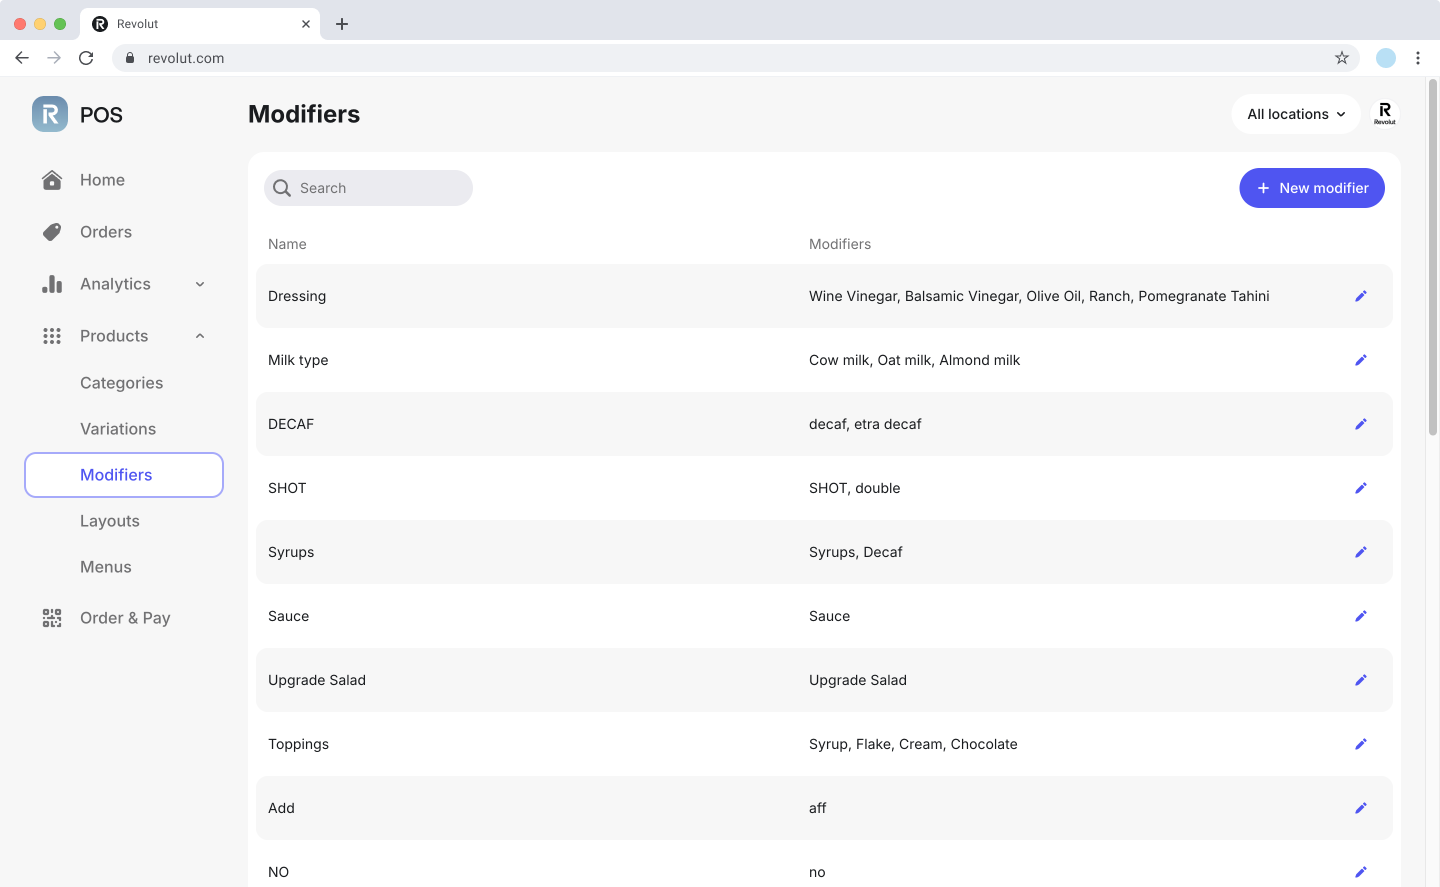
Before assigning modifiers to products, ensure the modifier have been created in the POS system. Once created, these sets can be applied during product creation or editing.
Add modifiers
To add a new modifier set:
- Navigate to Products > Modifiers on the left sidebar.
- Click
New modifier. - Enter the Name of your modifier set (e.g., "Cooking preference").
- Select the Type of the modifier:
- Single choice: Allows customers to select only one of the options (e.g., "Rare").
- Multiple choice: Allows customers to select multiple options (e.g., "Cheese" and "Tomatoes").
- Enter the modifier's details:
- Name: Add the name of each modifier (e.g., "Rare," "Medium," "Well done").
- Extra price: Optionally, enter an additional price for each modifier.
- Click
Add modifierto add additional options as needed. - Optionally, rearrange the order of the modifiers by dragging and dropping them.
- Click
Saveto create the modifier set.
Modifier prices cannot be edited for individual products; they apply globally to the products where the modifier set is assigned.
Assign modifiers
Modifiers can be added to a product either while creating a new product or editing an existing one.
- Navigate to Products on the left sidebar.
- Click
New productto create a new product. - Click
Addin the Add modifiers section and specify:- Modifier set name: Select the modifier sets from the list (e.g., cooking preferences, add-ons).
- Click
Continueto save the changes.
- Assign different prices to each variation if necessary.
- Click
Saveto apply the changes.
Edit modifiers
To modify a modifier set:
- Navigate to Products > Modifiers on the left sidebar.
- Click the icon next to the modifier set you want to modify.
- Update any of the modifier details and click
Saveto apply changes.
Delete modifiers
To remove a modifier set:
- Navigate to Products > Modifiers on the left sidebar.
- Click the icon next to the modifier set you want to delete.
- Click
Delete. - Confirm your choice to remove the variation set from your system.
Bulk import
You can upload multiple products at once using a CSV file. This feature saves time and effort, especially when setting up or updating a large catalogue, by allowing you to manage product details in bulk.
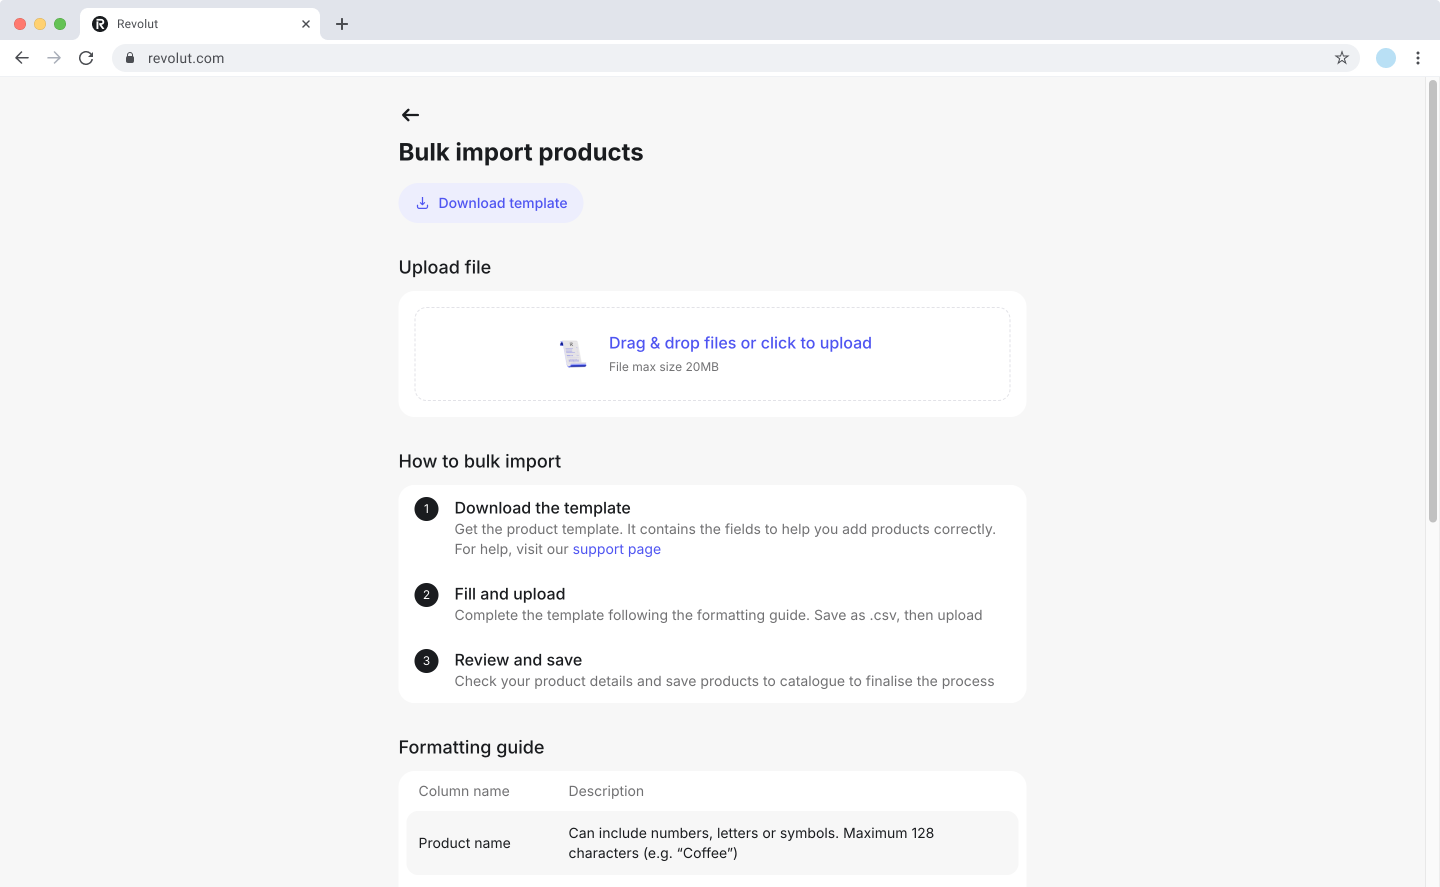
Create one product manually and export it as a CSV to understand the required format.
Before starting the bulk import, ensure you have created all necessary tax rates and modifier sets in the web app. This ensures your exported CSV template will include the correct headers and allows you to properly map each product to its modifiers.
To initiate a bulk import:
-
Navigate to Products on the left sidebar and click
Bulk import. -
Click
Download templateto save our CSV template. -
Populate the template with product details. At a minimum, you must include:
- Product name
- Category name
- Price
Additionally, ensure to:
- Assign modifiers and variations correctly.
- Follow the formatting guidelines.
-
Save the completed CSV file and upload it in the Bulk import products menu.
-
Review product details and click
Saveto finalise the process.
Layouts
Customise how categories and products appear on the iOS app. This feature allows you to create visually intuitive layouts, making it easier for staff to quickly find and select items during transactions.
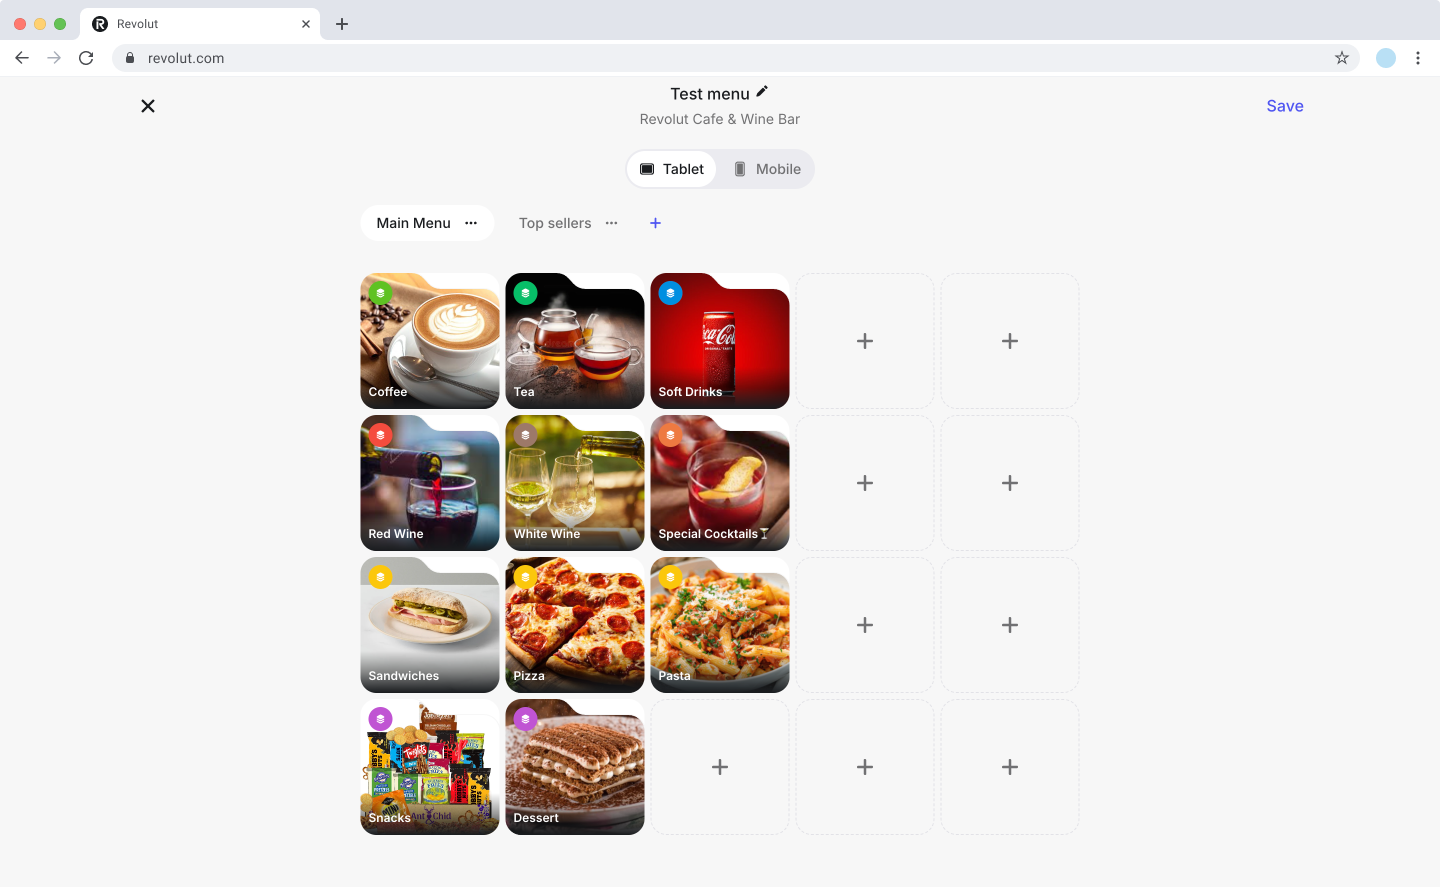
Add layouts
Multiple layouts can be created to suit different operational needs, such as peak hours, seasonal menus, promotional offers, or specific staff roles. Each layout can be organised across multiple tabs, providing an efficient way to group and manage products or categories.
-
Navigate to Products > Layouts on the left sidebar.
-
Click
New layout. -
Name your layout (e.g., "Breakfast menu" or "Weekend offers") and select the Location where you wish to use it.
-
Select your preferred view for editing:
- Tablet: Provides a 5x4 grid layout per tab to be used on your tablets.
- Mobile: Provides a 2x5 grid layout per tab to be used on your mobile devices.
-
Click on any grid position to add products and/or categories.
-
Optionally, click next to the default tab to create additional tabs for organising your layout.
-
Drag items to rearrange them within the grid.
-
Click Save to apply the changes.
Edit layouts
To edit your layouts:
- Navigate to Products > Layouts on the left sidebar.
- Click to see the available actions, you can:
- Edit details: To update the general details of your layout, such as its name, or assigned location.
- Edit layout: To modify the grid arrangement of products and categories of an existing layout.
- Duplicate layout: To create a copy of an existing layout, saving time when creating similar layouts with minor variations.
- Make your desired changes to the layout.
- Click
Saveto apply the changes.
Delete layouts
To delete your layouts:
- Navigate to Products > Layouts on the left sidebar.
- Click to see the available actions.
- Click Delete.
- Confirm your choice to remove the layout from your system.