Display the Revolut Promotional banner on your checkout page
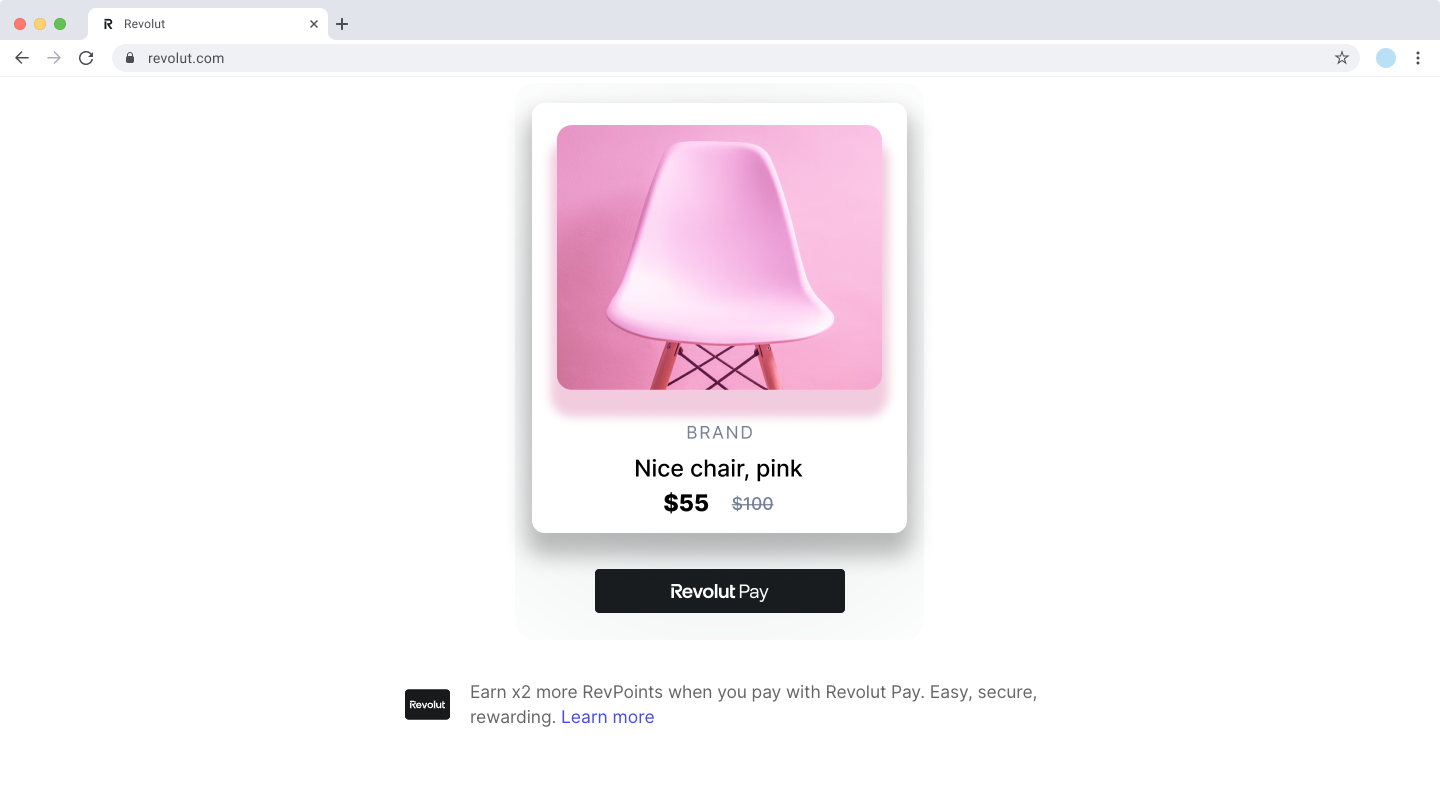
Enhance your checkout experience by displaying Revolut's promotional banner on your website. The promotional banner invites your customers to learn more about Revolut Pay and its benefits or to join Revolut and receive a reward.
Leveraging upsell flows, like offering rewards for new sign-ups, can be particularly effective. Analysis indicates that such flows can increase conversion to payment by approximately 5%.
In this tutorial, we'll walk you through the process of implementing the Promotional banner using the Revolut Checkout Widget. The Promotional banner allows you to provide additional information about Revolut Pay to your customers during checkout or to offer new Revolut users a reward after a successful purchase.
Customers who eventually join Revolut will receive a reward and will be able to use their Revolut account to pay via Revolut Pay (if it's available on your checkout) in the future.

How it works
The Promotional banner can be displayed in different variants, depending on where you want to place it in your checkout flow and what action you want your customers to take.
Promotional banner variants
The promotionalBanner module offers four variants:
| Variant | Description | Placement |
|---|---|---|
banner | Displays an informational banner with a brief description of Revolut Pay benefits. It allows your customer to open a pop-up with more details about the payment process and benefits. | Before the payment |
icon | Displays an icon which opens a pop-up with details on the Revolut Pay payment process and benefits. | Before the payment |
link | Displays a "Learn more" link which opens a pop-up with details on the Revolut Pay payment process and benefits. | Before the payment |
sign_up | Offers your customer to join Revolut, receive a reward, and gain access to Revolut Pay (if it's available on your checkout). This variant is shown after a successful purchase to promote registering with Revolut and encourage future use of Revolut Pay. | After a successful payment |
banner, link, and icon variants
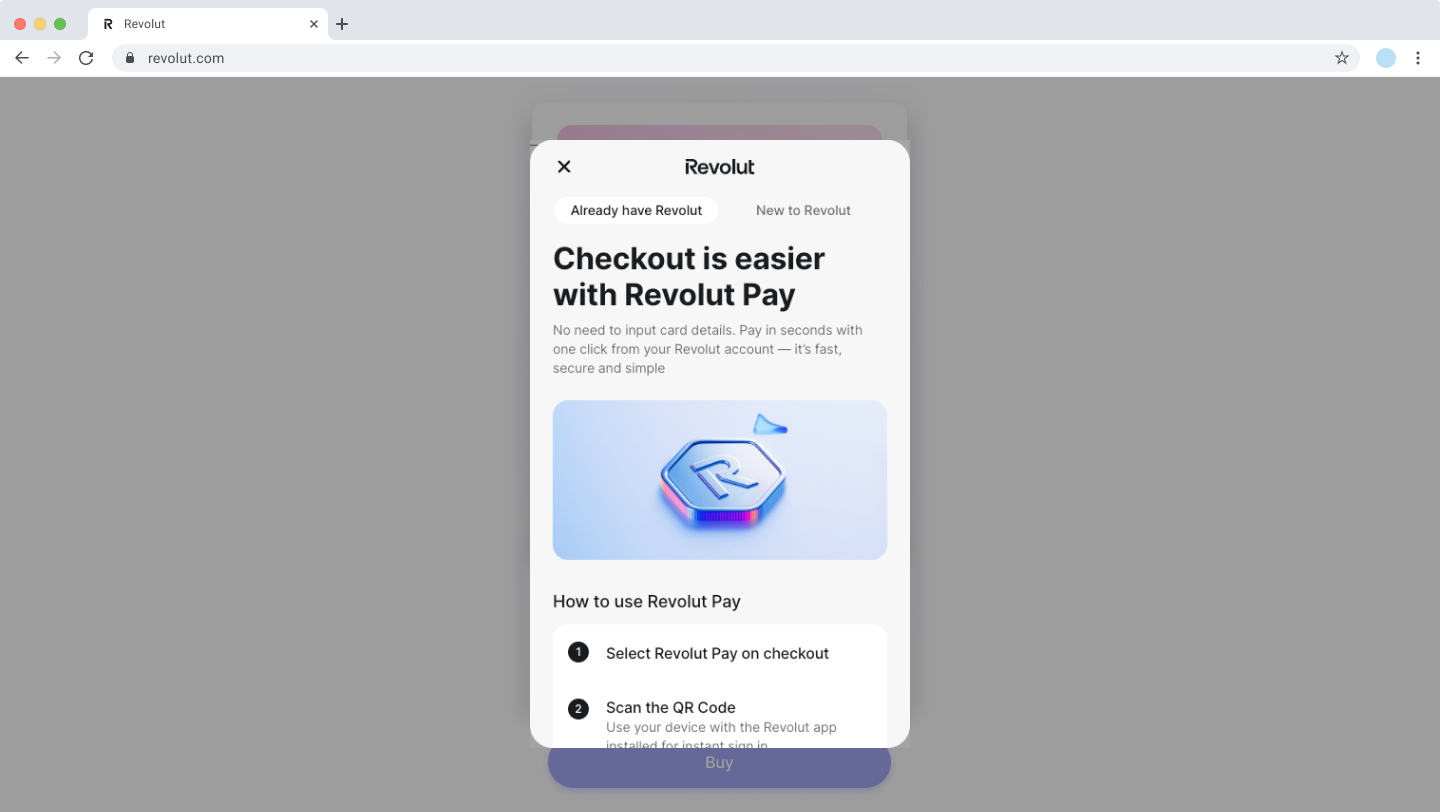
These variants are directly related to Revolut Pay. They are designed to be displayed before the payment during your checkout process. When customers interact with these elements, they open a pop-up window providing additional information about Revolut Pay and its benefits.

sign_up variant
This variant is intended to be displayed after a successful purchase. It promotes registering with Revolut, offers customers a reward, and encourages them to use Revolut Pay for future purchases (if it's available on your checkout).
Implementation Overview
To implement the Promotional banner on your website, you need to:
- Install the Revolut Checkout Widget
- Initialise the upsell module
- Configure the Promotional banner
- (Optional) Customise the banner
- Mount the banner
Before you begin
Before you start this tutorial, ensure you have completed the following steps:
Implement the Promotional banner
1. Install the Revolut Checkout Widget
First, ensure the Revolut Checkout Widget is installed in your project. This widget is necessary to display the Promotional banner. You can install the widget via your project's package manager.
npm install @revolut/checkout
Alternatively, you can add the embed script directly to your page. For more information, see: Install the widget: Adding the embed script.
2. Initialise the upsell module
Import the RevolutCheckout package into your project and use the .upsell() method to load the upsell module with your Merchant API Public key.
import RevolutCheckout from '@revolut/checkout';

const { promotionalBanner } = await RevolutCheckout.upsell({
  locale: 'auto', // Optional, defaults to 'auto'
  mode: 'sandbox', // Optional, defaults to 'prod'
  publicToken: '<yourPublicApiKey>', // Merchant public API key
})

// Further initialisation and configuration code will go here
3. Configure the Promotional banner
Depending on the variant you choose, you'll need to configure the bannerOptions object accordingly and mount the banner to a target element on your page.
Choosing a variant
Decide which variant of the Promotional banner you want to implement:
- Before payment: To provide more information about Revolut Pay during the checkout process, choose one of the
banner,link, oriconvariants. - After payment: To offer new Revolut users a reward after a successful purchase, choose the
sign_upvariant.
3.1 Implementing the banner, link, or icon variants
These variants are designed to be displayed before the payment. They provide customers with information about Revolut Pay and its benefits.
import RevolutCheckout from '@revolut/checkout';

const { promotionalBanner } = await RevolutCheckout.upsell({
  publicToken: '<yourPublicApiKey>' // Merchant public API key
})

const bannerOptions = {
  variant: 'banner', // Choose 'banner', 'link', or 'icon'
  currency: 'GBP', // ISO 4217 currency code
  amount: 1000, // Amount in minor units (e.g., pence for GBP)
}

// Mounting code will go here
Displaying the pop-up
When customers interact with the banner, link, or icon, a pop-up window opens, providing more details about Revolut Pay and its benefits.
3.2 Implementing the sign_up variant
The sign_up variant is designed to be displayed after a successful payment. It invites customers to join Revolut, receive a reward, and use Revolut Pay for future purchases.
Optionally, you can provide further information about your customer using the bannerOptions.customer object.
import RevolutCheckout from '@revolut/checkout';

const { promotionalBanner } = await RevolutCheckout.upsell({
  publicToken: '<yourPublicApiKey>' // Merchant public API key
})

const bannerOptions = {
  variant: 'sign_up',
  transactionId: '<uniqueTransactionId>', // Unique ID from your system
  currency: 'GBP',
  amount: 500, // Optional: Reward amount in minor units
  customer: {
    name: 'Example Customer',
    email: 'example.customer@example.com',
    phone: '+441234567890'
  }
}

// Mounting code will go here
For a complete list of parameters and their function, see: Upsell.promotionalBanner.
4. (Optional) Customise the banner
Optionally, you can customise the appearance of the banner using the style object within the bannerOptions.
sign_up variant
const bannerOptions = {
  variant: 'sign_up',
  currency: 'GBP',
  amount: 1000,
  style: {
    border: '1px solid #ccc',
    borderRadius: '5px',
    backgroundColor: '#f9f9f9',
    primaryColor: '#007681'
  }
}
icon variant
const bannerOptions = {
  variant: 'icon',
  currency: 'GBP',
  amount: 1000,
  style: {
    size: 'small', // 'regular' or 'small'
    color: 'black', // 'blue' or 'black'
    outline: true // true or false
  }
}
5. Mount the Promotional banner
Finally, mount the banner to a target element on your page with the bannerOptions you defined.
promotionalBanner.mount(document.getElementById('promotional-banner'), bannerOptions)
Examples
Example with minimal required parameters (defaults to sign_up variant)
import RevolutCheckout from '@revolut/checkout'

const { promotionalBanner } = await RevolutCheckout.upsell({
  publicToken: '<yourPublicApiKey>'
})

const bannerOptions = {
  transactionId: '<uniqueTransactionId>',
  currency: 'GBP'
}

promotionalBanner.mount(document.getElementById('promotional-banner'), bannerOptions)
Example with all parameters - banner variant
import RevolutCheckout from '@revolut/checkout'

const { promotionalBanner } = await RevolutCheckout.upsell({
  locale: 'en',
  mode: 'sandbox',
  publicToken: '<yourPublicApiKey>'
})

const bannerOptions = {
  variant: `banner`
  currency: 'GBP',
  amount: 500
}

promotionalBanner.mount(document.getElementById('promotional-banner'), bannerOptions)
Example with all parameters - icon variant
import RevolutCheckout from '@revolut/checkout'

const { promotionalBanner } = await RevolutCheckout.upsell({
  locale: 'en',
  mode: 'sandbox',
  publicToken: '<yourPublicApiKey>'
})

const bannerOptions = {
  variant: `icon`
  currency: 'GBP',
  amount: 500,
  style: {
    size: 'small',
    color: 'blue',
    outline: true
  }
}

promotionalBanner.mount(document.getElementById('promotional-banner'), bannerOptions)
Example with all parameters - link variant
import RevolutCheckout from '@revolut/checkout'

const { promotionalBanner } = await RevolutCheckout.upsell({
  locale: 'en',
  mode: 'sandbox',
  publicToken: '<yourPublicApiKey>'
})

const bannerOptions = {
  variant: `link`
  currency: 'GBP',
  amount: 500
}

promotionalBanner.mount(document.getElementById('promotional-banner'), bannerOptions)
Example with all parameters - sign_up variant
import RevolutCheckout from '@revolut/checkout'

const { promotionalBanner } = await RevolutCheckout.upsell({
  locale: 'en',
  mode: 'sandbox',
  publicToken: '<yourPublicApiKey>'
})

const bannerOptions = {
  variant: `sign_up`
  transactionId: '<uniqueTransactionId>',
  currency: 'GBP',
  amount: 500,
  customer: {
    name: 'Example Customer',
    email: 'example.customere@example.com',
    phone: '+441234567890'
  },
  style: {
    border: '1px solid black',
    borderRadius: '0',
    backgroundColor: 'white',
    primaryColor: '#007681'
  }
}

promotionalBanner.mount(document.getElementById('promotional-banner'), bannerOptions)
Alternative solutions
Alternatively, if you're using the Revolut Checkout Widget for card payments, you can integrate the promotional banner directly within the widget. For more information, see: